
New-Profile-Wizard updated: 2020-03-02
How to get here: In the main window click  and then on Manage Profiles > New using Wizard
The best way to create a new profile is to use the "Wizard" capability. The wizard takes you through a sequence of windows that explain the various settings and help you decide how to set them. It will also calculate baseline algorithm settings that are likely to work reasonably well for your set-up. Creating a profile this way is faster and less error-prone than doing it by hand in the 'Connect Equipment' dialog. When you run for the first time on your system, this wizard will be automatically launched. Subsequently, you can use the new-profile wizard by clicking on the 'Manage Profiles' field in the 'Connect Equipment' dialog, then choosing 'New using wizard...'.
The wizard asks a number of questions that are important for getting your profile built correctly. The explanatory text in each pane of the wizard should make clear what is being asked and what needs to be done. But here are some additional tips to help you through the process:
- Connection Options: As you make selections for the various devices, you will usually see a prompt asking if the device is already connected and ready to communicate with . If you say 'yes', will try to connect and then fill in some of the data fields with information read from the device. Saying 'no' simply means you'll have to enter the data by hand. If tries to connect with the device and fails, you'll still be able to proceed by just entering the data manually. Device-connection in the wizard is basically a convenience feature that makes it easier to fill in the fields with accurate values. You won't see the prompt if already knows the device can't return useful information - for example, if the mount choice is 'on-camera.'
- Camera connection pane: unbinned pixel size. If you said 'yes' to the connection prompt, this information will usually be filled in automatically and the control will be disabled. If you said 'no' or if the device doesn't report its pixel-size, you'll need to enter the value by hand. You should be able to get the unbinned pixel size from the camera spec sheet or the manufacturer's web site. If the pixels aren't square, just specify the larger dimension or the average value if you prefer. This won't have any effect on your actual guiding results, but it will allow to know the image-scale for your set-up. This is used for setting baseline guiding parameters, doing sanity-checks on calibrations, reporting guiding performance, and getting support on our forum..
- Camera connection pane: binning level. If your guide camera supports binning (many do not), you can specify what level of binning you want to use for this equipment profile. If you want to use the same equipment set-up with different binning levels, it's best to create separate profiles for each binning value. If your guide camera has very small pixels and you have also specified a long focal length, you may see a 'warning' icon next to the Pixel Scale field. That is telling you that the specified image scale is probably too small and you should bin the camera if possible.
- Camera connection pane: guide scope focal length. This seems to be a common place for mistakes, so it's worth being careful and getting it right. The correct value is not the aperture of the guide scope, it is the focal length. So, for example, if you're guiding with a 50mm finder scope, the focal length will not be 50mm - it will probably be something closer to 150-175mm. A 60-80mm refractor guide scope will probably have a focal length in the range of 240-500mm, not 60-80mm. Similarly, if you're guiding with an OAG on your main imaging scope, the focal length will be that of the main scope. In some cases, you may be using a small threaded focal reducer on the guide camera, so that must also be taken into account. Like the pixel-size entry, the focal length doesn't demand a great deal of precision, but you should get as close as you can. Otherwise, the performance numbers may not reflect your actual results and the baseline guiding parameters may be sub-optimal.
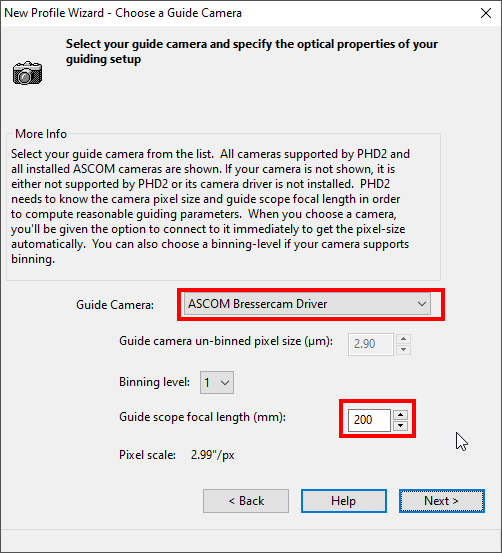
Example: using a BRESSER Color GPCMOS02000KPA on an Omegon 50/200 guider telescope - Mount connection pane: mount guide speed. This is another area that seems to cause confusion. The guide speed is a parameter set in the mount or in the mount driver, it's not something controlled by . never sets the mount guide speed, it only reads it. It is usually expressed as a multiple of the sidereal rate and is typically in the range of 0.5x - 1x sidereal. Despite what you may read elsewhere, it's usually best to use guide speeds in this range rather than much lower speeds. Higher guide speeds can help to clear backlash more quickly and may help to overcome stiction problems. If you say 'yes' to the connection option prompt, will attempt to read the current guide speed from the mount. If this fails for some reason, you'll need to enter the guide speed manually. uses this value to automatically set the calibration step-size and to aid in checking calibration results; but the guide speed information is not important for the actual guiding. If you're using different guide speeds on the RA and Dec axes, enter the larger value. If you really can't determine what the guide speed settings are in the mount, leave the setting at the default value of 0.5X. This pane also has a checkbox regarding the presence of high-precision encoders in the mount. These devices are somewhat rare but are sometimes included on expensive, high-precision mounts, and you are likely to know if you have them. Most users will leave this box unchecked.

Example: using a iEQ45 mount set to a mount speed or guiding rate of 0.25 on both axis - Adaptive Optics setting pane
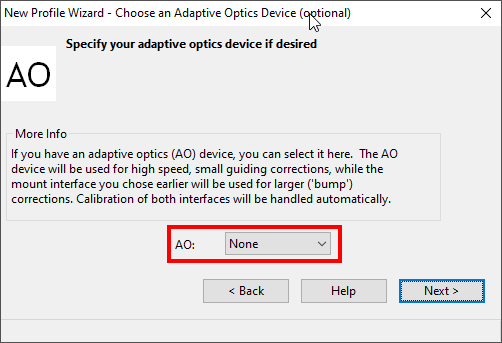
- In the last pane of the wizard dialog, you're given two options:
- To automatically restore the calibration whenever the profile is loaded and
- to immediately build a dark library when the new profile is saved and the wizard completes.
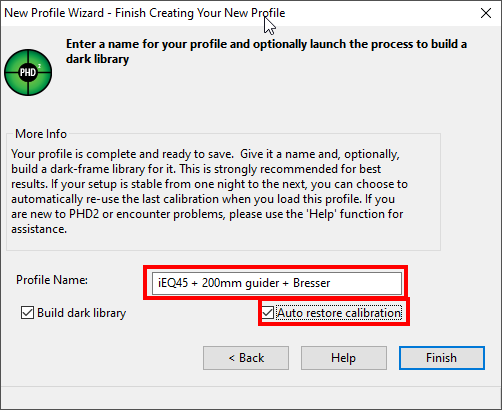
The first option is only presented if your profile uses an ASCOM or INDI mount. It is a convenience item especially for users with permanent setups. You can also use this option if you can insure that the guide camera orientation in its adapter tube remains the same from one night to the next. If you're in doubt or don't want to bother with how the guide camera is oriented, leave the box unchecked. You should always select the option to build a dark library unless you already have a compatible dark library that you're going to import from a different profile. If you are changing cameras and want to keep the dark libraries and bad-pixel maps associated with the old camera, you should create a separate profile for the new camera. When a camera selection is changed in an existing profile, the previously built dark library and bad-pixel map data will no longer be usable. That also applies to using the same camera with different binning values. Setups using different binning factors should be kept in separate profiles because the dark library and bad-pixel maps depend on the binning factor.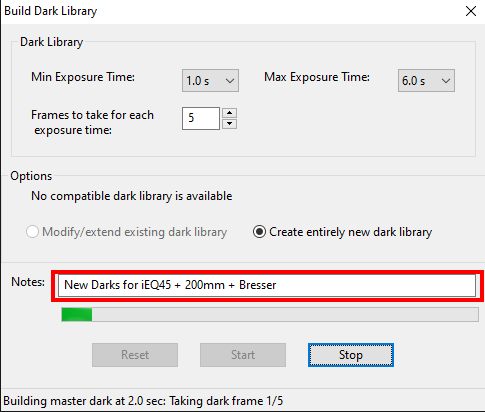
Created with the Personal Edition of HelpNDoc: Full-featured Help generator