
Actual Step |
Step 3c: High Point Scientific Collimation Approach |
updated: 2025-10-09 |
|
Purpose |
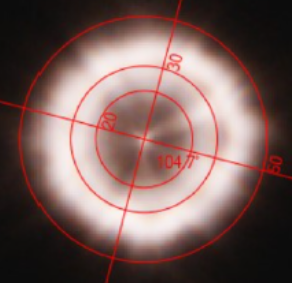
In the final stage of the process, the telescope's optics are refined using a real or artificial star in order to restore the well-balanced image of the stars to its original point-like form. This is achieved by eliminating any distortions or elongations that may have occurred during the previous stages of the process. |
|
|
Previous Step |
||
|
Next Step |
2 alternative follow-up steps: |
|
|
Resource(s) |
|
|
|
Credentials |
||
|
Primary Mirror Adjustments |
||
Step |
What To Do |
Illustration |
1 |
Primary Mirror Adjustments
|
|
2 |
This telescope is in poor collimation. The question now is which of the three screws do you need to adjust to bring the telescope into a better state of alignment.
|
|
3 |
Once this is accomplished, look at the primary mirror collimation screws (at the back of the telescope) and see which one of those screws best aligns with your hand placement.
|
|
4 |
Short focal ratio imaging Newtonians will have a secondary mirror that is physically offset from the center of the tube. It might be a small amount, but it is offset. This offset can show in a star test if the star is defocused too far, and because of that fact, it is important to work through the following final step.
|
|
|
Secondary Mirror Adjustments |
||
Step |
What To Do |
Illustration |
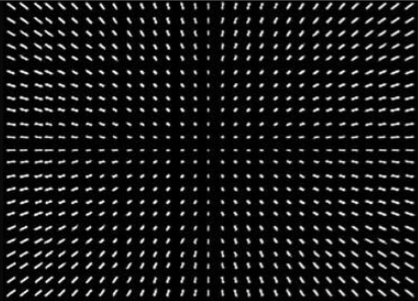
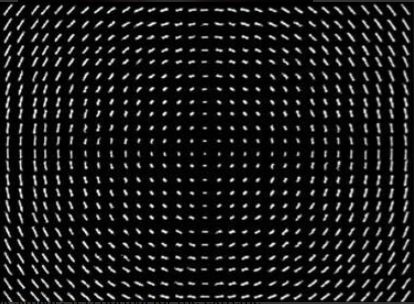
5 |
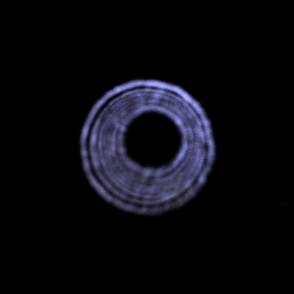
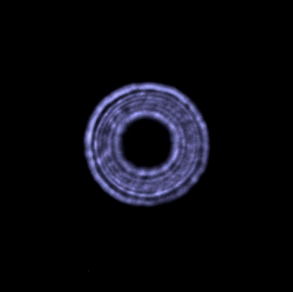
Balanced Image
|
|
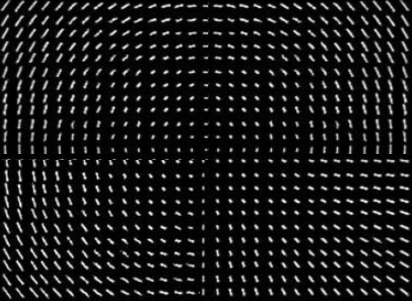
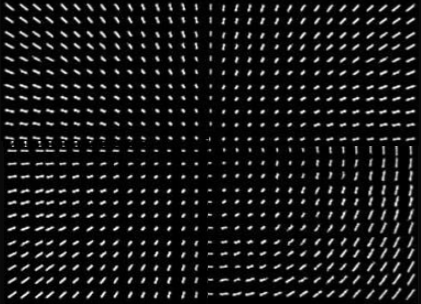
6 |
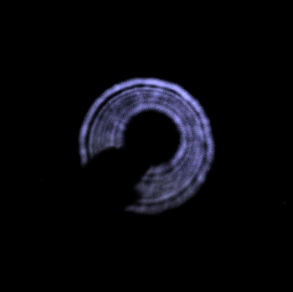
Unbalanced ImageYou might notice that one of the corners is quite different from its opposing corner. If the stars look like one of the following images, then you need to adjust the secondary mirror to balance the image:
In the event you can not fully balance the image, get it as close as you can, and then go back and recheck the primary. It is likely that the system was far off and the primary needs a small adjustment before coming back to the secondary mirror. It is not abnormal to go back and forth from primary to secondary when really trying to perfect the star images. |
|
Created with the Personal Edition of HelpNDoc: Effortlessly Create Encrypted, Password-Protected PDFs