
ASIAIR based workflow |
Guiding with ASIAIR |
updated: 20242-12-06 |
If you had to move or dismantle the equipment between 2 shooting sessions (e.g. during the day), you should definitely re-calibrate the guiding before starting a new series of shots by tapping on the  icon on the Guiding Setup Screen.
The Guiding Setup Screen can be opened in the Preview, Autorun and Live modes, simply touch the guiding graph pane to enter the auto guiding setup controls:

During Preview, Autorun and Live mode screens you can simply touch the guiding graph pane to enter the auto guiding setup controls:

This will open the Guiding setup screen:
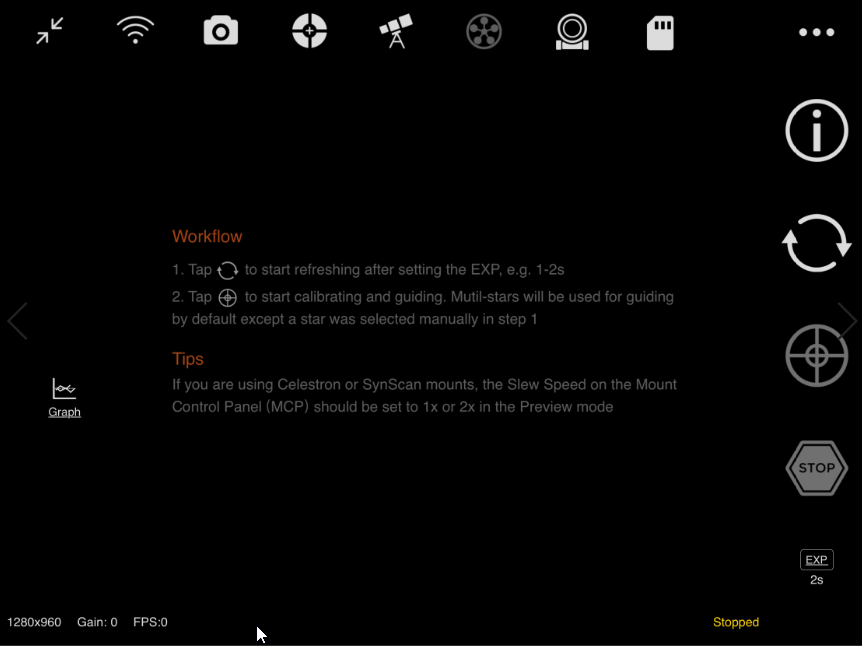
 Tap this button for the guider calibration data. The graph shows the movement of the star formed by the guide pulse sent by ASIAIR during calibration. The line represents the RA and Dec guide star rates calculated as a result of the calibration. They should generally be approximately vertical
Guiding Re-Calibration Steps:
- set the exposure time (on the bottom right side of the Guiding Setup screen)
- tap the Refresh icon

- tap the Start Calibration icon
- The calibration starts, the telescope will be moved slightly to different directions (N, W S, E) in order to calibrate the guiding speed required. This will take several minutes.
- When finished the guiding starts and graph can be displayed showing the quality of the guiding:
- To enable dithering, go to the Guide Settings tab on the right side menu.
- Tap on
 To hide the Guide setup display.
 - To stop guiding tap on the
 icon.
icon.
Created with the Personal Edition of HelpNDoc: Why Microsoft Word Isn't Cut Out for Documentation: The Benefits of a Help Authoring Tool