
ASIAIR based workflow |
Transferring Images |
updated: 2023-07-02 |
Previous Step |
||
Next Step |
||
There are 2 simple ways how to transfer images between your ASIAIR and your PC:
- Insert a USB drive (USB memory stick) to a free USB port at your ASIAIR and transfer the images from the CF card to the USB drive
- Connect your PC with the ASIAIR using a wired LAN connection or a WiFi connection
- (remove the CF card from your ASIAIR and use a CF card reader, inconvenient, but the only way to upload files to the ASIAIR)
Using a wired LAN connection or a WiFi connection
When your ASIAIR is connected to your local LAN via LAN cable or WiFi you can simply open a file explorer window on your PC and enter the IP address of your ASIAIR (please check the real IP address on the ASIAIR network setting screen, the 10.0.0.1 is just the factory setting):

The TF Images folder is the standard image folder of the ASIAIR CF Card, the Udisk Images folder is only available if an additional USB drive has been inserted.
Opening the TF Images folder will display the typical folders available on the CF card: 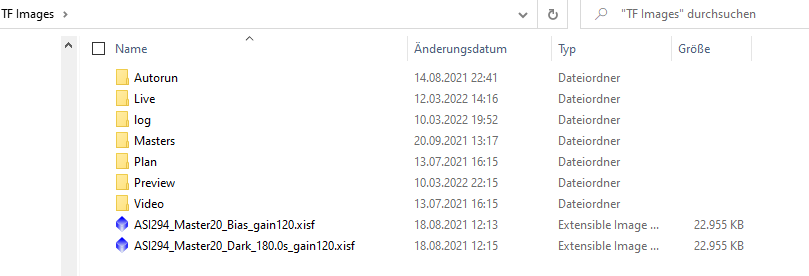
You will find your pictures in the the corresponding process folders.
Uploading files to your ASIAIR
Due to permission restrictions it is not possible to copy files (e.g. master calibration files) from your PC to your AISIAIR CF Card or USB drive or between the two of them. The only way to do so is to insert the CF card into a card reader at your PC and directly copy the desired images (must be *.fit files,, *.fits or *.xfit files will not be recognized!).
Created with the Personal Edition of HelpNDoc: iPhone web sites made easy