
|
PixInsight - Improving the Non-Linear Image |
HDR Multiscale Transform
|
updated: 2021-10-28 |
|
Purpose |
HDR Multiscale Transform - produces an enhanced image |
|
Activation |
Menu: Process 🡺 All Processes 🡺 HDRMultiscaleTransform Process Explorer: Wavelets 🡺 HDRMultiscaleTransform |
|
Input |
Stretched image, file name “*_i_c_DBE_ABE_BN_CC_HT_MLT_FS.xisf” or similar into sub folder "aligned" |
|
Output |
Stretched image, file name “*_i_c_DBE_ABE_BN_CC_HT_MLT_FS_HDR.xisf” or similar into sub folder "aligned" |
|
Previous Step |
|
|
Next Step |
|
|
Tutorial |
Step |
Description |
Action |
||||
1 |
Open the Latest Imagefrom the last processing step |
e.g. “*_SM.xisf” |
||||
2 |
Create a Luminance Maskthis will create a B/W luminance image. Drag the tab on the left side of the luminance image on the left of the light frame image to create the mask. Then hide the mask (CTRL+K) |
|
||||
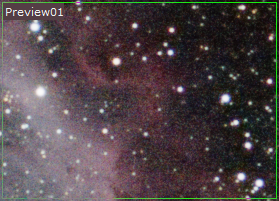
3 |
Make a Previewof a region of interest in your image and to reduce processing time during the testing |
ALT+N |
||||
4 |
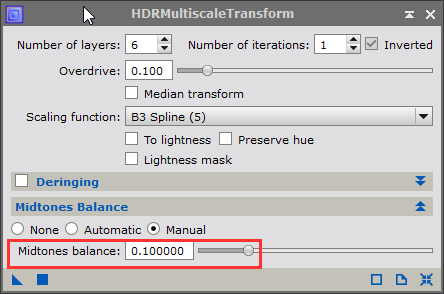
Open HDRMultiscaleTransformPlay around with the parameters, with the given image these parameters gave a very good result: Number if Layers: should be set between 4 and 6, lower and higher values will usually return a degradation of the image Number of iterations: a higher value will soften the image, the often best value is 1. Deringing: are designed to removed artifacts around sharp edges like stars - try is, result depend on the original image Midtones Balance: either automatic or manually set to 0.1
|
|
||||
5 |
Apply the function to the preview window |
Pull the blue triangle |
||||
6 |
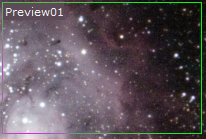
Compare Original and Transformed Imagein the preview window Example: using the B3 Spline scaling function |
|
||||
7 |
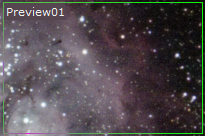
Compare Original and Transformed Imagein the preview window Example: using the Gaussian (11) scaling function . The Gaussian (11) scaling function showed even better results, clearer structures in the nebula and more stars where left over |
|
||||
8 |
Apply the HD function |
Pull the blue triangle |
||||
9 |
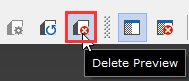
Remove the Preview and the MaskMenu 🡺 Mask 🡺 Remove Mask |
|
||||
10 |
Close the HDR tool |
|
||||
11 |
Final Stepfile name like “*_i_c_DBE_ABE_BN_CC_ HT_MLT_FS_SM_HDR.xisf” or "20170921_M8_FUJXT1_i_c_DBE_ABE_BN_CC_ HT_MLT_FS_SCNR_SM_HDR.xisf" in this case |
using postfix _HDR file name like “*_HDR.xisf” |

Created with the Personal Edition of HelpNDoc: Ensure High-Quality Documentation with HelpNDoc's Hyperlink and Library Item Reports