
|
PixInsight - Improving the Non-Linear Image |
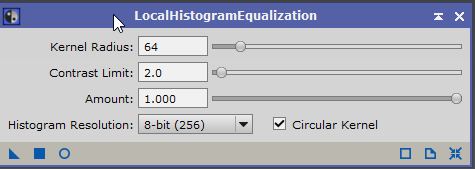
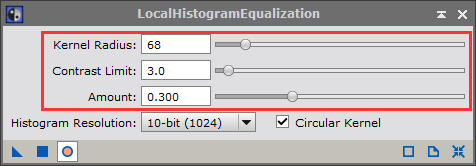
Local Histogram Equalization
|
updated: 2021-05-31 |
|
Purpose |
Implements local equalization of the histogram. Can be used to enhance local contrast and visibility of structures in the image. |
|
Activation |
Menu: Process 🡺 All Processes 🡺 Local Histogram Equalization Process Explorer: IntensityTransformations 🡺 Local Histogram Equalization |
|
Input |
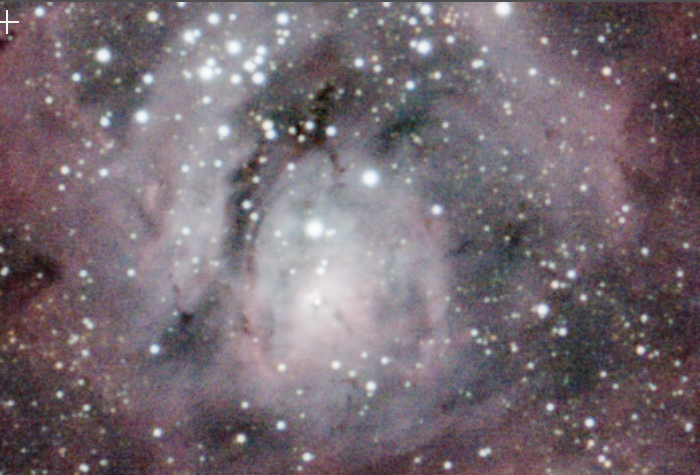
Stretched image, file name “*_i_c_DBE_ABE_BN_CC_HT_MLT_FS.xisf” or similar into sub folder "aligned" |
|
Output |
Stretched image, file name “*_i_c_DBE_ABE_BN_CC_HT_MLT_FS_LHE.xisf” or similar into sub folder "aligned" |
|
Previous Step |
|
|
Next Step |
|
|
Tutorial |
https://youtu.be/FxM5WGrvhoI?t=566 (Part 9 HDR starts around timestamp = 9 m and 44s) |


Created with the Personal Edition of HelpNDoc: Bring your WinHelp HLP help files into the present with HelpNDoc's easy CHM conversion