
Histrogram Stretch
|
PixInsight - De-Linearize or Stretch |
Histogram Stretch |
updated: 2025-12-31 |
|
Purpose |
Performing a full stretch on linear images |
|
Activation |
Menu: Process 🡺 All Processes 🡺 HistogramTransformation Process Explorer: IntensityTransformations 🡺 ScreenTransferFunction |
|
Input |
|
|
Output |
Stretched image, file name postfix: “*_HT” into sub folder "Work" |
|
Previous Step |
|
|
Next Step |
|
|
Tutorial |
Stretching an image with Histrogram Transformation in Pixinsight (youtube.com) |
Step |
Action |
Description |
1 |
Open the color calibrated image and unstretch it (20221029-233853_M33_ZWOASI294_0002_SPCC_NXBX.xisf in this example) |
|
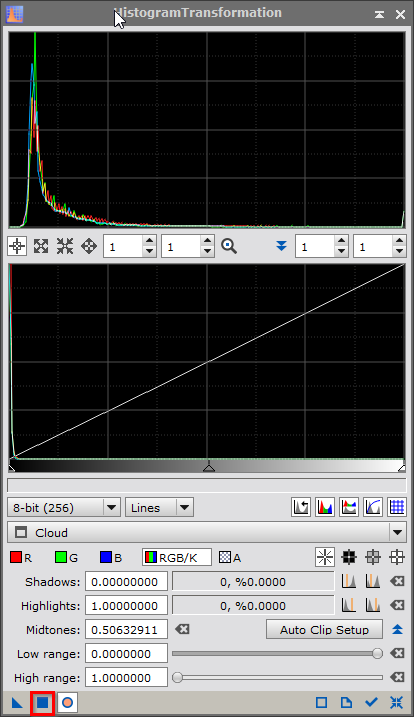
2 |
Open Histogram Transformation (HT) and reset the function |
|
3 |
Select the current image and unstretch it |
|
4 |
Enable Real Time Preview |
|
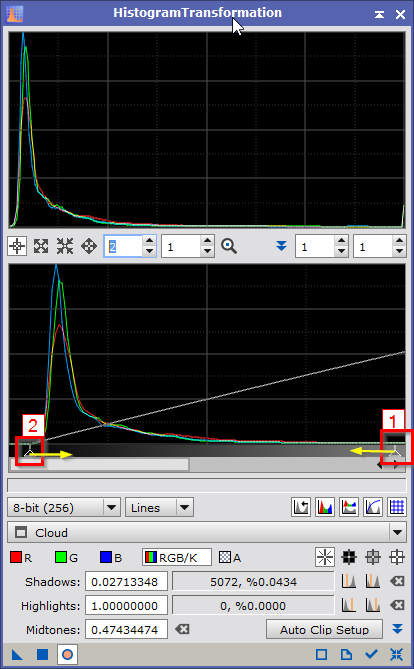
5 |
Set inital stretch To set an initial strech you can
OR
|
|
6 |
Resulting Preview: Apply the settings
|
|
6 |
Reset HT to reduce the double stretch in the preview window |
|
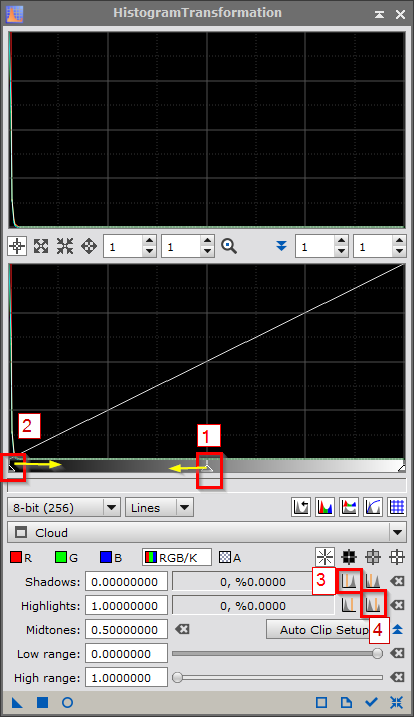
7 |
Drag the left slider 2 to the right
|
|
8 |
Resulting Image (Only a image section is shown here) |
|
9 |
Apply the settings
|
|
10 |
Repeat the steps 5 through 9 again until you are happy with the result. |
|
11 |
Close the Realtime Preview Window and reset HT |
|
12 |
Close HistogramTransform |
|
13 |
Save the fully stretched image |
file name like “*_HT.xisf” or similar into sub folder "work" |
15 |
Optional: Export the final image to JPEG format |
file name like “*_HT.jpg” or similar into sub folder "work" |


Created with the Personal Edition of HelpNDoc: 5 Reasons Why a Help Authoring Tool is Better than Microsoft Word for Documentation