
Session Planning using SGPro
|
4. Astro Session Workflows |
Session Planning using SGPro |
updated: 2021-10-01 |
|
Deployed Software (optional) |
||
Plan your session using the Sequence Generator Pro tool Framing and Mosaic Wizard
Planning the target and capture sequence
Menu: Tools > Framing and Mosaic Wizard
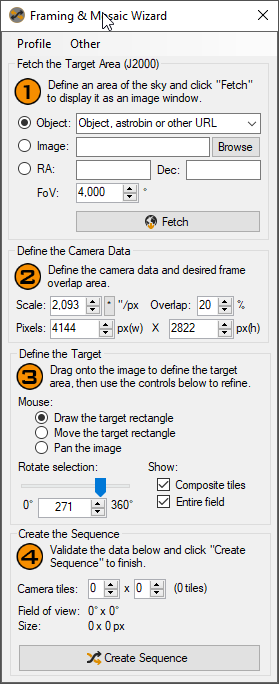
The easiest steps to plan a target and capturing settings are:
- Enter the name of the target (e.g. IC1386) and click on Fetch
- Enter the camera data:
- Scale: from the Optical Scale Tabelle depending on the used equipment
- Define the picture overlap percentage (for image stitching)
- Pixels x*y: from the Camera Tabelle
- Define the Target
- Draw the target rectangle - or
- Move the target rectangle - or
- Pan the image
- Select the desired camera rotation (note: this will only work if you are using an electronic or manual camera rotator!)
- Set the number of horizontal and vertical tiles for stiching
- Click on Create Sequence to generate the capturing sequence (this sequence is still independent on the the date and time of the planned session)
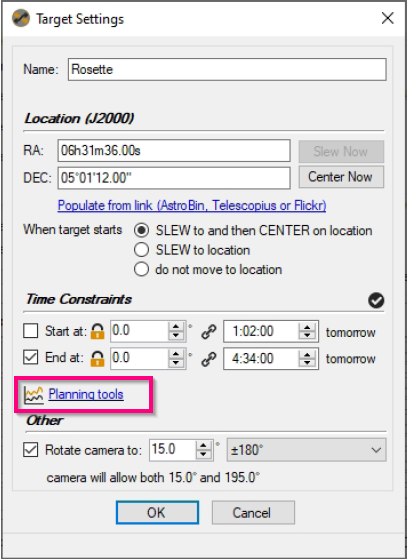
Date and Time Planning using the PlanningTool
In the SGPro Session Manager right click on a planned target, in the new Target Settings windows then click on Planning tools (see left picture below). This will open the Planning Tool (right picture)
 ==>
==> 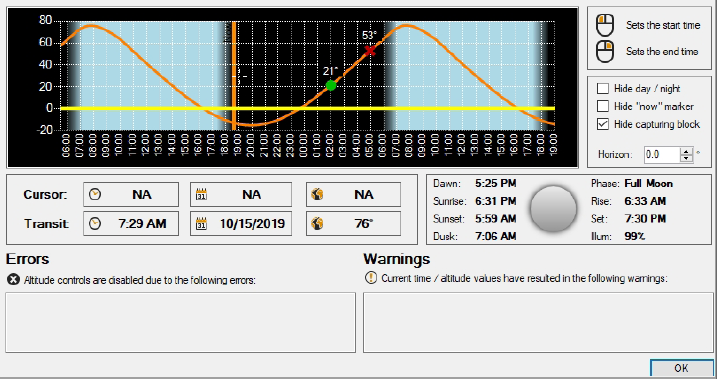
This tool helps you to check for the desired light conditions between dusk and dawn and also allows you the check the target elevation above the horizon.
Next Step: Equipment Check
Reference:
[1] Sequence Generator Pro Help.pdf
Created with the Personal Edition of HelpNDoc: News and information about help authoring tools and software