
SPCC Spectrophotometric Color Calibration
|
PixInsight |
Step 5: SPCC Spectrophotometric Color Calibration
|
updated: 2026-03-25 |
|
Purpose |
SPCC Spectrophotometric Color Calibration: Calibrates the color of a linear deep-sky image based on Gaia catalogs. The SPCC tool performs a balancing of the colors of a linear RGB deep-sky image based on the following documentary criteria:
Note that this is a spectrum-agnostic color calibration procedure, very different from other methods based on fixing a white reference with respect to a particular spectral type. |
|
Activation |
Process 🡺 All Processes 🡺 ColorCalibration |
|
Input |
Noise reduced image |
|
Output |
Color corrected image “*_SPCC” into sub folder "Work" |
|
Previous Step |
|
|
Next Step |
|
|
Resources |
PixInsight Reference Documentation | Spectrophotometry–based Color Calibration in PixInsight |
WARNING: be careful if using a cropped image as the image parameters like focal length and pixel size acquired from the image may no longer fit and will probably result in a plate solver error! It's easier to use an uncropped version and crop later.
Notice: image solver capability has been removed from SPCC. So before you can run the SPCC process you either have to make sure you activated the Astrometry Solution in WBPP or run the Image Solver script (Script > Image Analysis > Image Solver) on the final master light image to update the master file with astrometric data.
Gaia currently represents the state of the art in terms of stellar astrometry and photometry. The star catalogs and auxiliary data generated by Gaia are of the highest quality as they are based on measurements made from space. We at the PixInsight Development Team have already been using and recommending Gaia for all astrometry–related tasks in PixInsight for many years. Now we have implemented a new tool, SpectrophotometricColorCalibration (SPCC), which uses Gaia's mean BP/RP spectra[4] available since Gaia Data Release 3.[5] [6] [7] SPCC is the first of a series of tools we are developing to exploit the availability of Gaia mean spectrum data in PixInsight.
Switching from PCC to SPCC is straightforward. In both tools, we have the Catalog Search, Signal Evaluation and Background Neutralization sections. The only significant difference between these tools, for basic usage, is the ability to configure our own filters provided by SPCC. In PCC, we compare stars measured on our RGB image channels to the brightness of the same stars measured with the photometric filters used to build the APASS catalog. With the Gaia spectra database, we calculate the exact brightness of each star in the filters we have used to acquire our image. Hence, in the Calibration section, we can assign a filter for each color channel of the image.
|
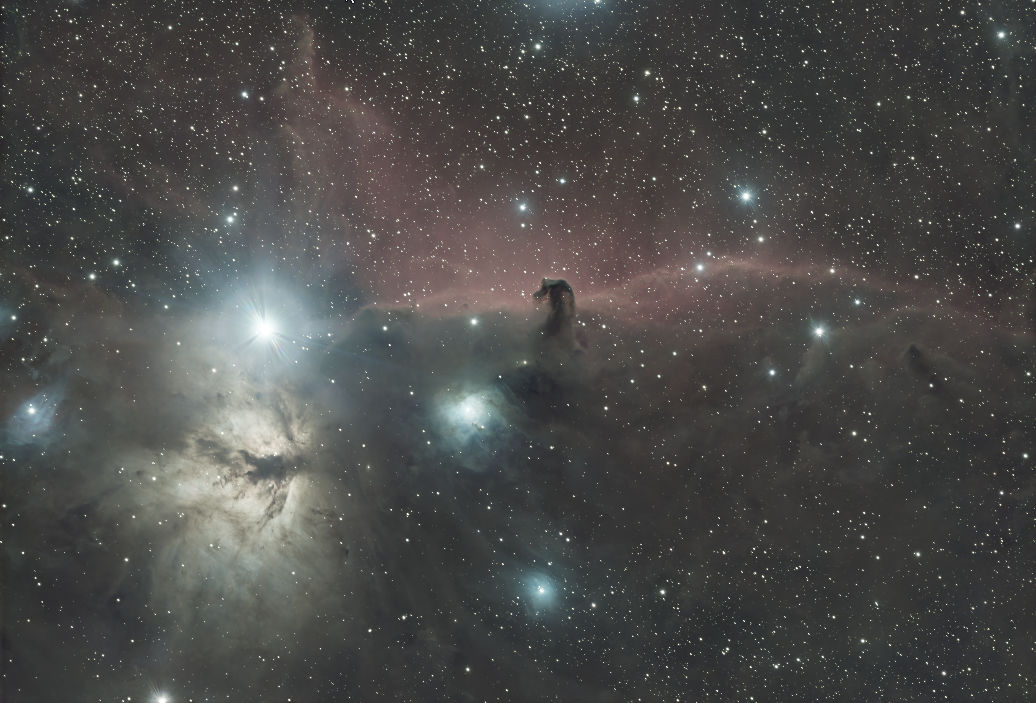
Before NoiseXTerminator |
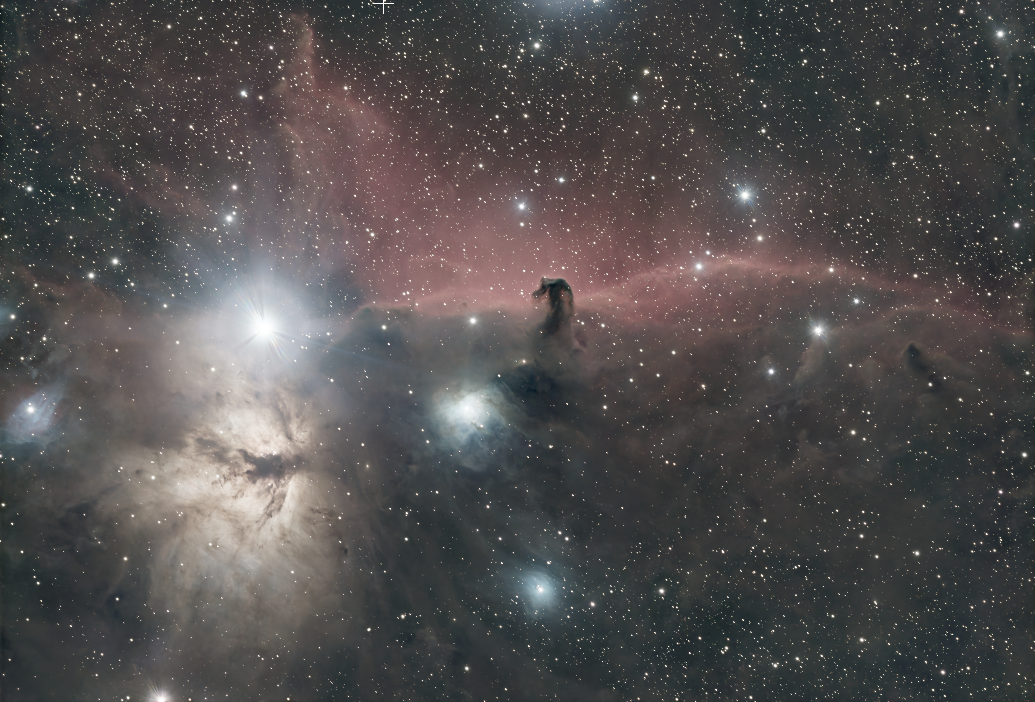
NoiseXTerminator |
|
|
|
Step |
Action |
Description |
1 |
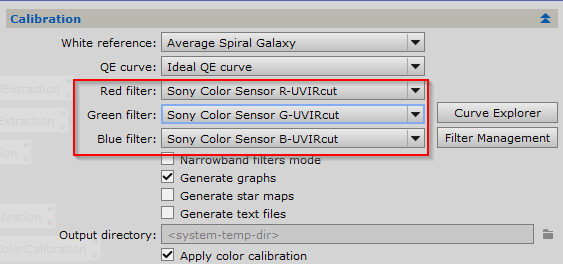
CalibrationThe default average spiral galaxy reference is the best choice for deep space objects. Irrespective of being a color image acquired with a monochrome or color camera, we should always select the three filters separately. As shown on the right, the default filters are those of a generic Sony color image sensor. The only difference regarding the type of camera is that, for a monochrome camera, we first need to create a color image with the ChannelCombination tool. (see documentation) When working with OSC cameras, we should always set the QE curve parameter to Ideal QE curve as shown on the right. |
|
2 |
Catalog SearchSPCC should always be used with local Gaia DR3/SP databases in XPSD format, which can be downloaded from our Software Distribution interface. Remarks: |
Using a local Gaia - XPSD database:
|
3 |
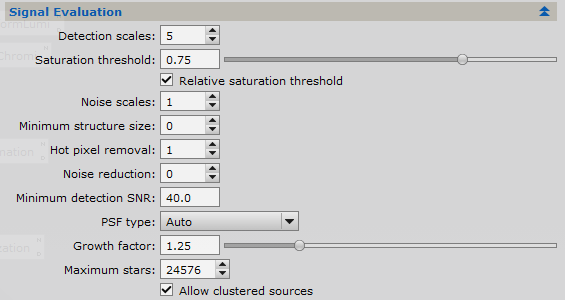
Signal EvaluationIf you encounter an error message like: Solutions:
|
|
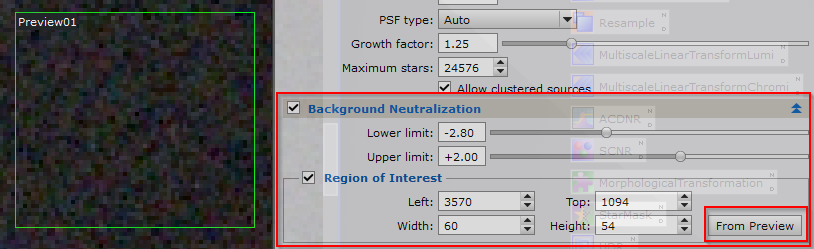
4 |
Background Neutralization
|
|
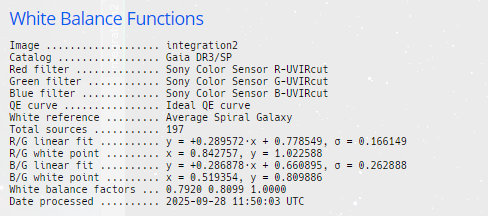
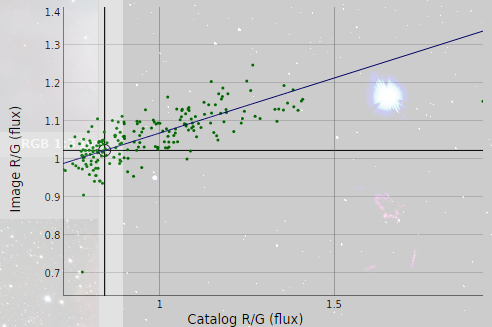
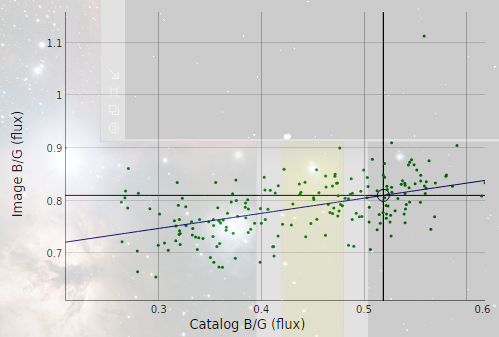
5 |
After Successful Transformationyou will get the calibration results:
|
|
6 |
Save the corrected image |
into a file like "*_SPCC.xisf" |

Created with the Personal Edition of HelpNDoc: Free help authoring environment