Steps
|
|

click to open
|
Preparation
M42 x 0.75 female threads are located on OCAL after opening the top cover. We recommend the following methods for Initial OCAL Setup:
- If your focuser has an M42 x 0.75 male thread, simply screw OCAL directly onto the thread on the focuser directly.
- If there is no thread at the end of the focuser and it uses a compression ring or screw fixed brass ring, please use some kind of extension adapter, such as 2-inch to m42, screw OCAL to the coupling threads of the coma corrector lens, and insert the coma corrector lens directly into the focuser. This method will achieve more precise collimation, but it will cause the image to be blurred.
- If possible remove the internal baffle on the main mirror that blocks obliquely incident light (this is possible e.g. on the TSO 203/1624 RC PRO)
- Use a lightpad or a backlit white sheet of paper in front of the telescope to make the details inside the telescope visible.
- Move the focuser to a position where the distance to the sensor plane is similar to the distance to the surface of the OCAL camera (e.g., 9200 EAF steps / 27 mm), as this affects the the calibration.
- Carefully loosen 2 of the 3 locking or fixation screws on the primary mirror (e.g. screws A and C) using a 2.5mm Allen key, but under no circumstances loosen the 3rd screw B, in order to prevent the mirror from shifting laterally.
- Place a flashlight inside the telescope and point it at the OCAL camera so that the red center mark on the OCAL camera is more clearly visible.
Please choose according to your own situation.
|
|

click to open
|
- It is recommended that one of the collimation screws, e.g. the "B" screw, be maintained in its current state, thus maintaining the mirror in its current position and changes in mirror spacing are avoided.
|
|
click to open
|
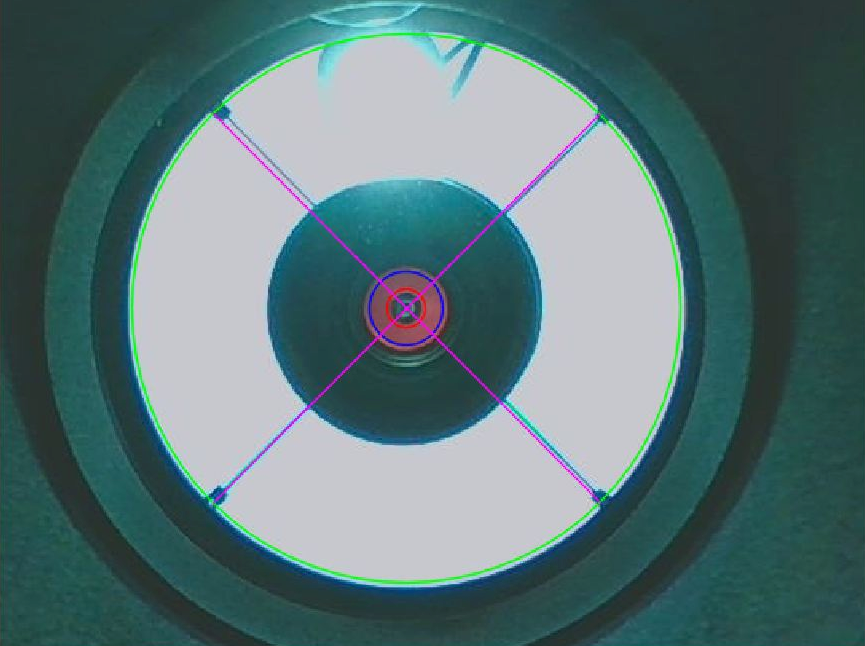
Misaligned Primary Mirror
- This picture shows a misaligned primary mirror
- The flashlight aimed at the OCAL camera is also clearly visible.
- Although the blue circle appears to correctly encompass the red center mark, the purple crosshair does not cover all four secondary mirror struts. This indicates that the primary mirror is slightly tilted.
|
|

|
Activate the blue circle in the OCAL App
- Check "Enable" to turn on the blue circle
- Adjust the size of the blue circle to match the size of the red OCAL camera center reflected from the back of the camera
|
|
|
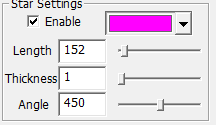
Activate the purple crosshair settings in the OCAL App
- Check "Enable" to turn on the purple crosshair (under Star Settings)
- Adjust the size of the purple crosshair to fit into the green (primary mirror) circle
- Adjust the angle of the purple crosshair so that the axes of the crosshair overlap with the retaining bars of the second mirror.
|
|
click to open
|
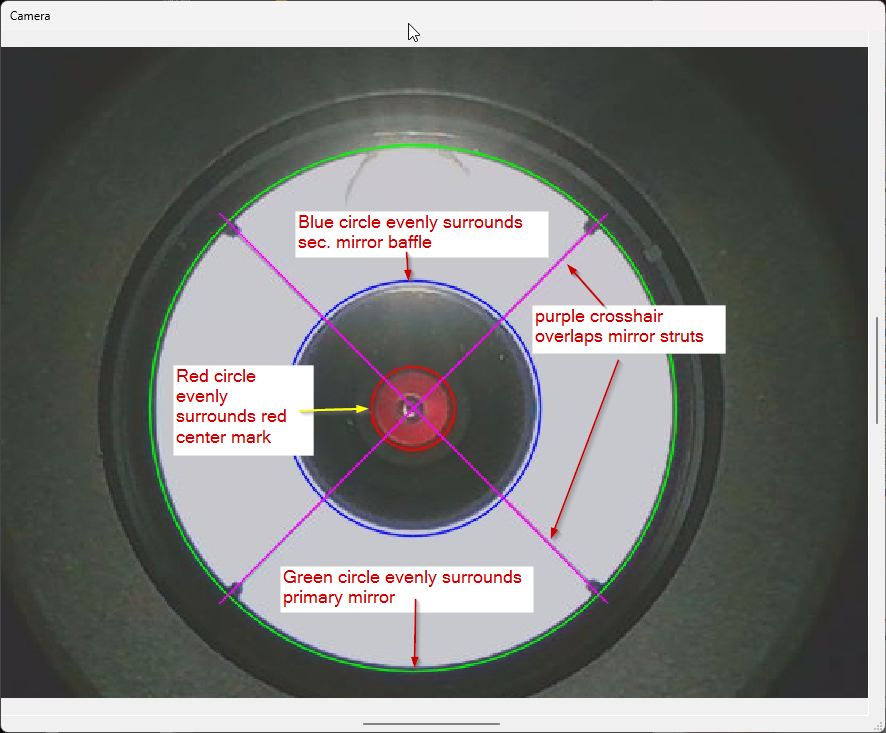
Align the misaligned Primary Mirror
- Goals:
- The green circle should precisely enclose the outer edge of the primary mirror.
- The red circle should surround the red center mark of the OCAL camera evenly.
- The blue circle should surround the edge of the black primary baffle.
(In the image on the left, the blue circle is too small. Instead, as shown in the image below, it should completely enclose the black primary baffle.)
- The purple crosshair should extend to the green circle and exactly cover the 4 mounting struts of the secondary mirror.
- Using collimation screws A and C (do not touch screw B!), adjust the blue circle until it evenly surrounds the outer edge of the primary baffle.
- After adjusting the collimation screws you might need to re-center the OCAL camera by correcting the center offsets.
- Also check the purple crosshair, which must exactly cover the mirror struts and rest on the black center mark of the secondary mirror.
- During this alignment you might need to re-adjust the secondary mirror as well.
|
|
click to open
|
Well aligned Primary Mirror
- The result at the end of this second and last step of the collimation should look like this.
- Collimation is finished and the telescope is ready for the night.
|
Finalization
|
- Re tighten the locking screws A and C slightly to prevents that the pressure on the cell gets too strong or that the mirror position remains unstable.
- Re-install the internal baffle on the main mirror.
|
Next Steps
|
Step 2: Collimation of the Secondary Mirror
|
Created with the Personal Edition of HelpNDoc: Make Documentation a Breeze with HelpNDoc's Clean and Efficient User Interface


