
|
PixInsight |
Step 5: SCNR - Correcting the Tint of the Image
|
updated: 2025-09-28 |
|
Purpose |
Final color correction If the final image still looks a bit greenish, reddish or blueish you can use SCNR to reduce the tint or color cast of your image |
|
Activation |
Menu: Process 🡺 All Processes 🡺 SCNR Process Explorer: NoiseReduction 🡺 SCNR |
|
Input |
Stretched image, file name “*_i_c_DBE_ABE_BN_CC_HT_MLT_FS.xisf” or similar |
|
Output |
Corrected image, file name “*_i_c_DBE_ABE_BN_CC_HT_MLT_FS_SCNR.xisf” or similar into sub folder "aligned" |
|
Previous Step |
|
|
Next Step |
|
|
Tutorial |
https://www.youtube.com/watch?v=-Hy531xgLUw& (at minute 27:56) (Part 8 Noise Reduction and Full Stretch) |
Step |
Action |
Description |
1 |
Open the SCNR Function |
|
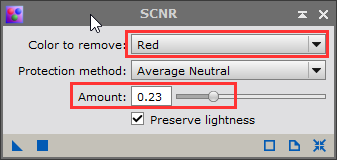
2 |
Select Color and Amountin this case the stars looked a bit reddish, by reducing the red color by 23% or 30% the image looks more neutral |
|
3 |
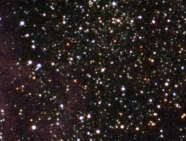
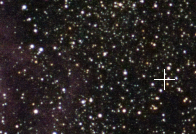
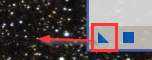
Apply the SCNR functionJust pull the little blue triangle onto the image... original corrected
|
|
14 |
Save the Color Corrected Imagefile name like “*_i_c_DBE_ABE_BN_CC_HT_MLT_FS_SC.xisf” or similar into sub folder "aligned" (or 20170921_M8_FUJXT1_i_c_DBE_ABE_BN_CC_HT_MLT_FS_SC.xisf in this case) |
using postfix _SC file name like “*_SC.xisf” |
Created with the Personal Edition of HelpNDoc: Streamline Your Documentation Process with a Help Authoring Tool