
Actual Step |
Visual Polar Alignment with iEQ45 |
Updated: 2023-08-03 |
Previous Step |
||
Next Step |
||
|
Required Equipment |
|
|
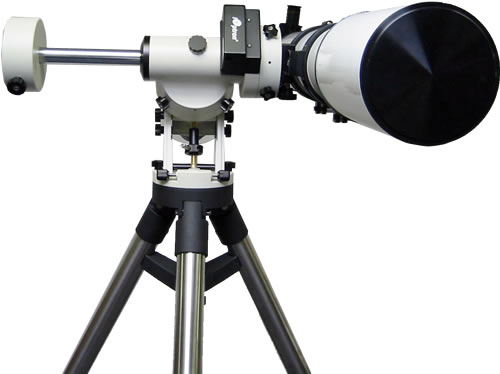
Hardware |
iEQ45 Pro |
|
Software (optional) |
iOS App Polar Scope Align Pro |
- Make the Polar Alignment using iEQ45 integrated function or iPhone App Polar Scope Align Pro
- Remove both the Polar Axis cover and the Polar Scope cover.
- Insert the polar LED into the threaded hole on the polar scope. Connect one end of the polar scope power cable to the illumination LED and the other end to the recticle connector on the main control board.
- Loosen the four R.A. coupling screws and rotate the R.A. axis to the horizontal position as shown below (to open the polar scope optical fiber):
 .
. - Use the ◄ or ► key to adjust polar scope dial to ensure that 12 o’clock is at the top. If the polar scope is equipped with a bubble level indicator, you may use the bubble as the reference.

- Check if the status of the GPS = OK on the handheld device
- Getting the current position of Polaris:
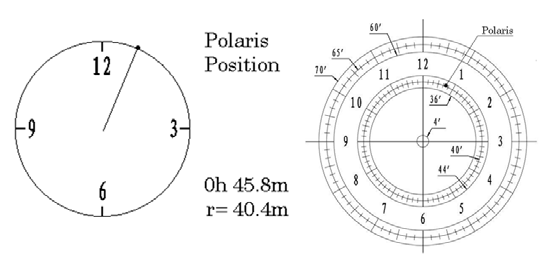
- Method 1: Using a iEQ45 function: Use the Hand Controller (MENU => “Alignment” => “Position of Polaris/SigmaOct”) to display the current position of Polaris on the LCD screen, as indicated in the left side of the figure below (in this case Polaris is at position 0h45,8m at a radius (r)of 40,8m:
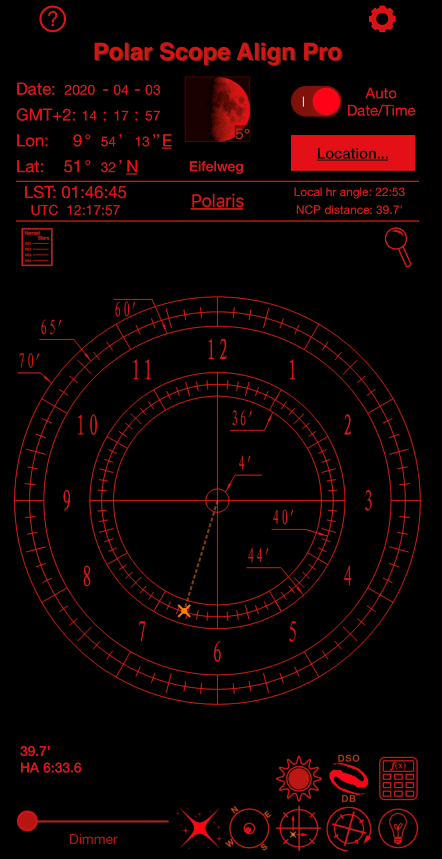
- Method 2: Using the iOS App Polar Scope Align Pro:
- Use the A.Z. azimuth screws and the latitude adjustment lever to move Polaris in the pole finder to exactly the same position as indicated in the previous step.
- When finished, tighten the latitude locking screws and the azimuth locking screws.
- Return the instrument to the Zero Position for the next step.
Continue with Computer and SW Start
Created with the Personal Edition of HelpNDoc: Create HTML Help, DOC, PDF and print manuals from 1 single source