
|
PixInsight - Frame Selection |
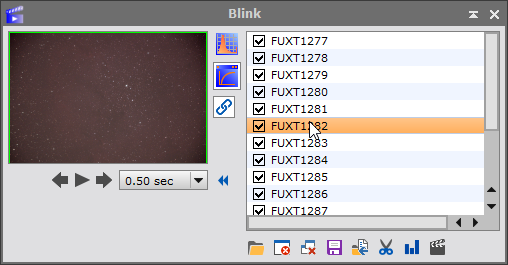
Blink: Manual Frame Selection |
updated: 2026-03-31 |

|
Purpose |
Evaluating and Rejecting Bad Frames (e.g. with clouds, meteoroids, airplanes, vibrations, blurred pictures …). |
|
Activation |
Menu Process 🡺 All Processes 🡺 Blink |
|
Input |
aligned original images (light, dark, ...) |
|
Output |
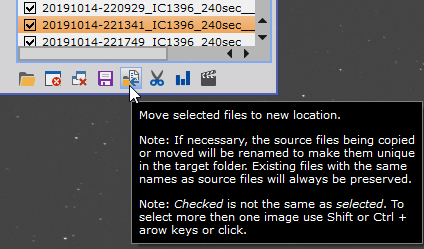
approved pictures, should be stored in subfolder "1_Approved" bad ones will be moved to a subfolder named "1_Rejected" |
|
Previous Step |
|
|
Next Step |
|
|
Tutorial |
Step |
Action |
Description |
1 |
Add Light Frames
|
Remark: importing a 56MB RAF file from a Fuji takes more than 1 minute! |
2 |
Check Lightframes
|
|
3 |
|
|
4 |
Next Step: Automatic Frame Selection |
|


Created with the Personal Edition of HelpNDoc: Effortlessly Create High-Quality Documentation with a Help Authoring Tool