|
PixInsight
|
Creating Time-Lapse Clips Using Blink and FFmpeg

|
updated: 2026-08-02
|
Time-lapse footage of certain astronomical events can be very impressive. Examples of such events include:
- Lunar eclipses
- Solar eclipses
- Aurora borealis
- Meteor showers
This chapter describes how to convert burst photos into short video clips using the PixInsight Blink process and the video editing program FFmpeg.
Step
|
Description
|
Action
|
|
1
|
Pre-select good frames with Blink
- Process 🡺 All Processes 🡺 Blink
- see this description how to use Blink
- Move all good files to the subfolder ..Video/selected
|
|
|
2
|
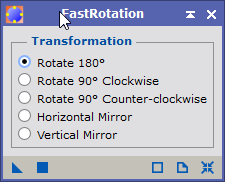
Rotate wrong orientated frames with Fast Rotation (optional)
This step is required in case your equipment had to do a Meridian Flip during the capturing session.
- Process 🡺 Geometry 🡺 FastRotation
- follow the steps described in the chapter Bulk Image Rotation
- Set the output folder to the subfolder ..Video/selected/rotated
|
|
|
3
|
Apply the Debayer function
- Process 🡺 All Processes 🡺 Debayer
- Apply the debayer function to all rotated frames, see the Debayer Function descrpition.
- Output all debayered frames to the subfolder: ..Video/selected/rotated/debayer
|
|
|
4
|
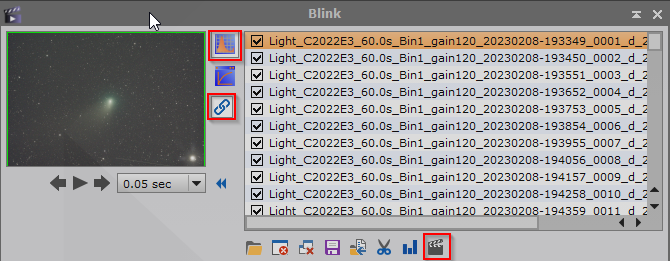
Open Blink again to generate the video file
- Process 🡺 All Processes 🡺 Blink
- activate Apply automatic histogram transformation for all frames.
- Do not activate Compute Auto STF if the quality of the images are too different (changing sky quality over time)
- Click on the film icon
 to open the video converter window: to open the video converter window:
|
|
|
4a
|
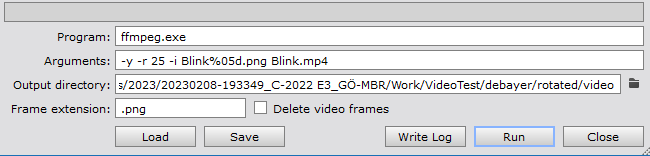
Blink Video Converter Settings
- Program: ffmpeg.exe (must be placed into the PixInsisght \bin folder to work)
- Argument examples:
- -y -r 25 -i Blink%05d.png Blink.avi for AVI files
- -y -r 25 -i Blink%05d.png Blink.mp4 for mp4 files
- Framerate: 25 fps, no downscaling applied, original scale: 4144x2820 px
- -y -r 10 -i Blink%05d.png -vf scale=1280:800 Comet.mp4
- Framerate: 10 fps, Scale: 1280x800px.
- -y -r 20 -i Blink%05d.png -vf scale=1920:1080 Blink.avi to scale the output file to a standard HD video format
- Framerate: 20 fps, Scale: 1920x1080px
- Frame file extension: .png (Blink will generate intermediate PNG files that will be used by ffmpeg for the video file generation)
- FFmpeg command line parameters:
- FFmpeg {-params ...} -i {input files} {output file}
- -y: Overwrite existing files without asking
- -r {20 | 25 | 30 | ...} : frame rate specifier in frames per second
- -i {URL or Input files}, example: (-i Blink%05d.png) will use file like Blink00001.png to Blink99999.png
- {output file}: in these examples above, Blink.mp4 is the name of the output file
- -vf scale=1920:1080 : rescale to target resolution
- -stream_loop {n}: loop video: n=-1: endless, n=0: no loop, n=1: loop 2 times etc.
- Some more FFmpeg parameters:
|
|
|
4b
|
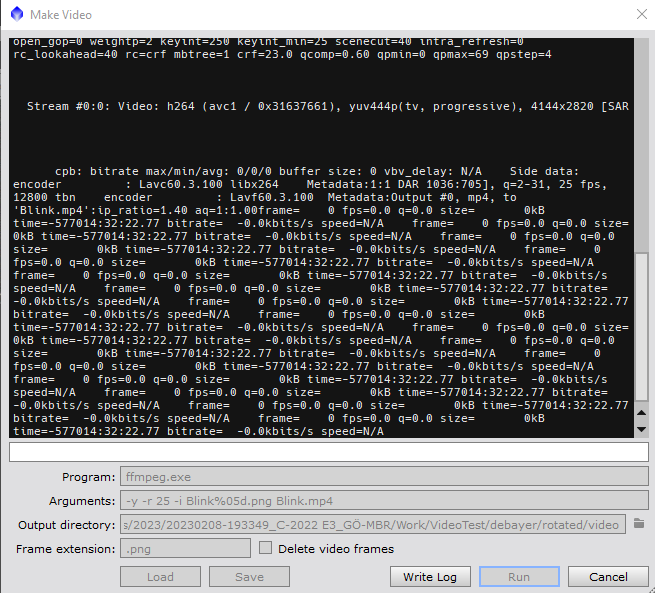
ffmpeg Conversion
When ffmpeg takes over to generate the video file, the processing screen looks like this:
|
|
|
5
|
More Post-processing
If more post processing is needed, e.g. to increase the contrast or saturation, you can use tools like the Movavi Video Converter. This video converter is easy to handle and provides options for many different target video file formats and devices in addition to water marks on videos and contrast and saturation enhancements.
|
|
About the ffmpeg.exe file
Created with the Personal Edition of HelpNDoc: Maximize Your Reach: Convert Your Word Document to an ePub or Kindle eBook