
|
PixInsight - Alignment and Integration |
Light Frame Calibration |
updated: 2025-10-14 |
|
Purpose |
Using the original light frames and calibrating them with the previous generated master calibration frames to create calibrated light frames. |
|
Activation |
Process 🡺 All Processes 🡺 Image Integration |
|
Input |
Light frames from folder "1_Approved" from step Frame Selection Dark, Bias and Flat Master calibration frames |
|
Output |
Calibrated Light Frames into folder "2_CalibratedLightFrames" |
|
Previous Step |
|
|
Next Step |
|
|
Resource(s) |
PixInsight — Master Calibration Frames: Acquisition and Processing Calibration Process (in this document) |
Calibrated light frames can now be generated using the master Light, Flat, Dark and Bias frames from the previous chapters.
Step |
Description |
Action |
1 |
Open the Image Calibration module |
|
2 |
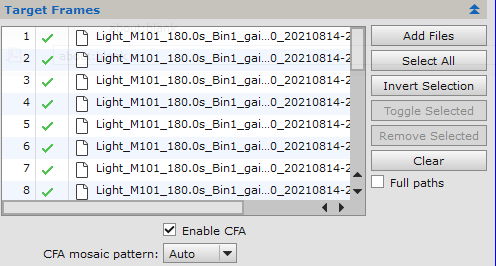
Add Light FramesUse the original, unprocessed approved light frames for calibration from folder "1_Approved" |
|
3 |
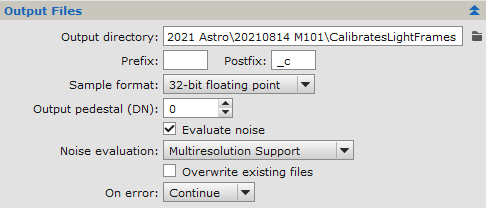
Output Filesuse subfolder "2_CalibratedLightFrames" as storage for the calibrated light frames |
|
4 |
Include the Master Bias frame
|
|
5 |
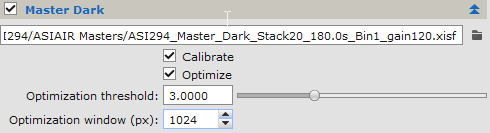
Include Master Dark frame
|
|
6 |
Include the Master Flat filefrom previous step IMPORTANT: Flat Frames should also include the correct filter name in the FITS header. As color light frames from an ASIAIR OSC camera never contain any filter information, they will be treated as NoFilter files and therefore the Flat Frames must have the FITS entry FILTER = NoFilter as well in order to be accepted by the WBPP or FBPP batch pre-processing scripts (see chapter Calibration Frames for more details) |
|
7 |
Run the Calibration Process |
Click on the The calibrated light frames will be stored to subfolder: |
8 |
Go to next step: Debayering |
|


Created with the Personal Edition of HelpNDoc: Transform Your Documentation Process with HelpNDoc's Project Analyzer