
|
PixInsight - Master Calibration Files |
Master Flat Calibration Frames Part II |
updated: 2025-10-21 |
|
Purpose |
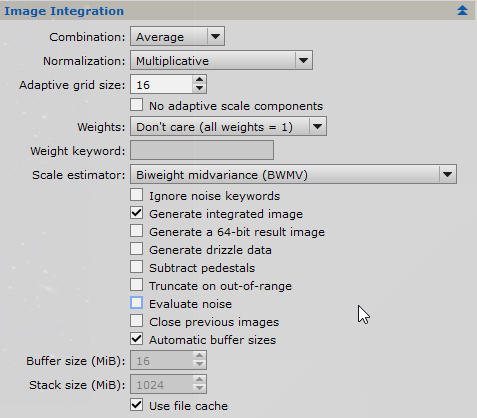
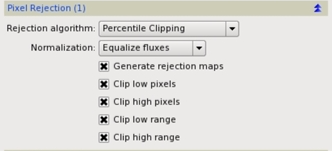
Once we have calibrated the individual flat frames, we'll integrate them. After bias and dark subtraction, the flat frames are strictly composed of illumination data. Therefore, we must match the illumination levels of all flat frames. This is the key to do a good flat frame integration. Illumination fitting is done by multiplying each flat frame to match the average pixel value of all flat frames. This is done by selecting multiplicative normalization in the Image Integration section of ImageIntegration. Average pixel value fitting is also important to achieve a good rejection of outliers. In the Pixel Rejection (I) section, we'll select the flux equalization option to normalize the frames. As in the bias and dark frame integration, we'll disable image weighting. The pixel rejection algorithm to use will depend on the number and type of flats that we have. In the case of sky flats (where we have stars on a highly illuminated sky), or in case of using a small number of flat frames, the best rejection algorithm is percentile clipping. This is the best option to reject the stars. IMPORTANT: Flat Frames should also include the correct filter name in the FITS header. As color light frames from an ASIAIR OSC camera never contain any filter information, they will be treated as NoFilter files and therefore the Flat Frames must have the FITS entry FILTER = NoFilter as well in order to be accepted by the WBPP or FBPP batch pre-processing scripts (see chapter Calibration Frames for more details) |
|
Activation |
Process 🡺 All Processes 🡺 Image Integration |
|
Input |
Calibrated flat files (folder: e.g.: "\_Astro\ASI294 Calibration\Config 3\20191022_Flat ASI294 -10C\Calibrated Flats" calibrated flat files have a "*_c" postfix |
|
Output |
Calibrated Master Flat File - e.g. MasterFlat_FUXT3FU135_FoL-135_FILTER-UVIR67_EXPOSURE-30.00s_BIN-1_ISO-3200_6246x4170_CFA.xisf |
|
Previous Step |
|
|
Next Step |
|
|
Tutorial |
PixInsight — Master Calibration Frames: Acquisition and Processing |
Step |
Description |
Action |
1 |
Open the Image Integration module |
|
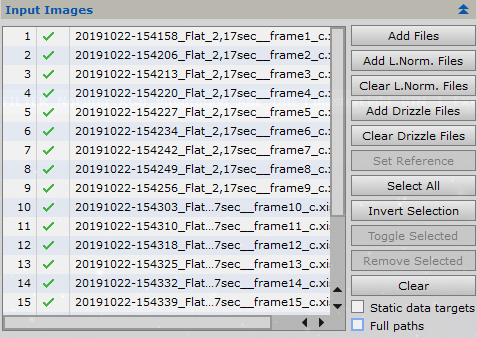
2 |
Add Flat Frames from the Master Flat Generation I
|
|
3 |
Image Integration Section
|
|
4 |
Pixel Rejection (1) Settings
|
|
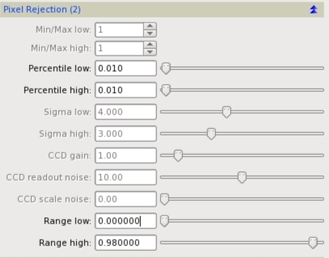
5 |
Pixel Rejection (2) settings
|
|
7 |
Run the Calibration Step I
|
|
8 |
Save the Calibrated Master Flat File
|
|
9 |
Next Step: Light Frame Calibration |
|


Created with the Personal Edition of HelpNDoc: Free Kindle producer