
ASIAIR based workflow |
Target and Mosaic Planning using Telescopius.com and ASIAIR
|
updated: 2025-07-17 |
|
Purpose |
Capturing mosaic images of a target that is too large to fit in a single frame. |
|
|
Previous Step |
||
|
Next Step |
||
|
See also |
||
|
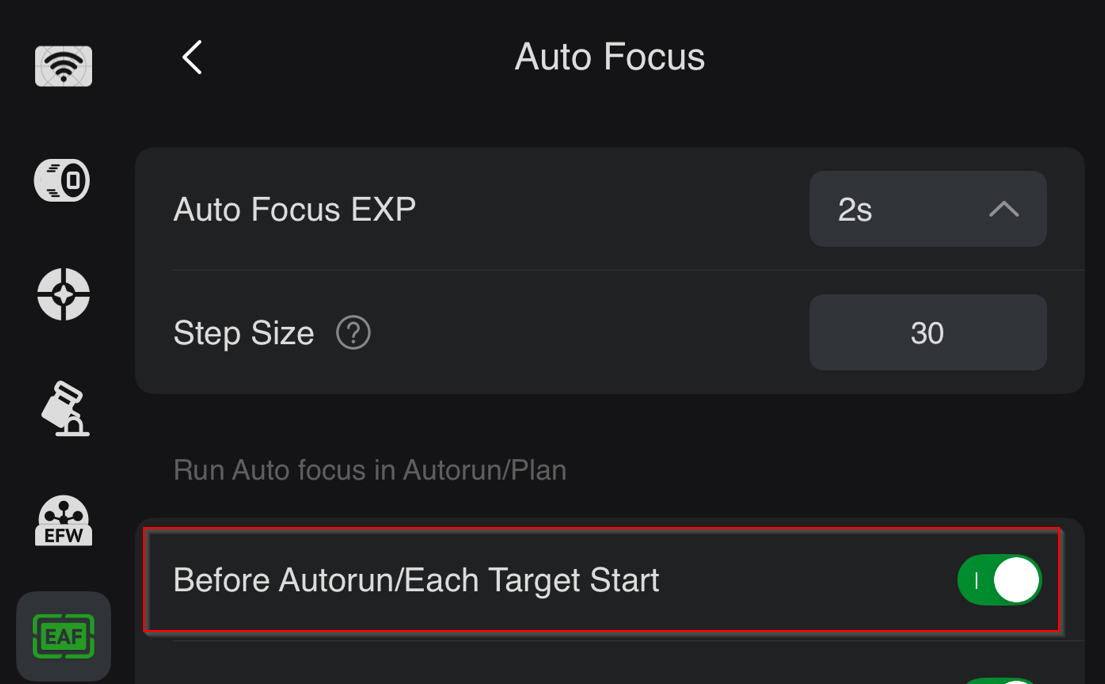
IMPORTANT |
Make sure you have activated AutoFocus in the EAF settings before Autorun or each Target Start, or the plate solve for your first target may fail! Set the ZWO EAF close to the expected focus point, which depends on your optical configuration. To autofocus before going to your main target, first go to a favorite target (e.g., the home position; the scope won't move and will autofocus). Then, move on to the next target. |
|

Telescopius.com provides a very valuable online preparation tool for your astro session, you should register at Telescopius,com and also enter your equipment to get the most out of this tool.
TIP: If you plan to take pictures with an ASIAIR, be sure to plan your targets on the same cell phone (or better yet, tablet) that you will be using with the ASIAIR app during the photo session, so that you can easily transfer the target plans to your ASIAIR device!
Telescopius Target Planning Process
Telescopius provides an easy to use 2-step planning process
Procedure |
click on the images to open in higher resolution |
Telescopius Observatory SettingsOnce your observation site has been defined, Telescopius calculates all visible targets for your location. Start by selecting the planned date. Telescopius also brings up some moon and weather information: |
|
Filter Target Object Settings |
|
|
Select your telescope |
|
|
Select your Camera This panel also allows you to preset the camera rotation to get an optimal target fit for your instruments using the lower "Position Angle" section.
|
|
Display Target and View FrameAn image of the target is displayed with the frame that your instrument will see: |
|


Framing / Mosaicing with Telescopius.com
Procedure |
click on the images to open in higher resolution |
Telescopius Observatory Settings
|
|
Set Mosaic SettingsYou can easily define a set of overlapping frames by clicking on the Mosaic icon on the menu sidebar:
For example, if you want an image of the whole nebula, you need a 2x3 mosaic. |
|
Display of Target and Mosaic View Frame
|
|
|
Transfer To transfer the session plan to an ASIAIR device connected to your mobile device, just click on Copy CSV and you will get a list like this, that can be pasted into the session plans of ASIAIR: Pane, RA, DEC, Position Angle (East), Pane width (arcmins), Pane height (arcmins), Overlap, Row, Column Pane 1, 21hr 46' 08", 58º 29' 44", 0.00, 109.20, 74.40, 20%, 1, 1 Pane 2, 21hr 34' 59", 58º 29' 44", 0.00, 109.20, 74.40, 20%, 1, 2 Pane 3, 21hr 45' 59", 57º 30' 13", 0.00, 109.20, 74.40, 20%, 2, 1 Pane 4, 21hr 35' 09", 57º 30' 13", 0.00, 109.20, 74.40, 20%, 2, 2 Pane 5, 21hr 45' 50", 56º 30' 43", 0.00, 109.20, 74.40, 20%, 3, 1 Pane 6, 21hr 35' 17", 56º 30' 43", 0.00, 109.20, 74.40, 20%, 3, 2 |
|
|
If you have prepared your plans on your tablet or mobile phone that also runs the ASIAIR app, you can easily paste the target plan from Telescopius.com into the ASIAIR plans: |
|
|
Click on copy CSV, go to the Plan Mode of ASIAIR and click on the |
Plan Mode |
Check that Autofocus is enabled for each GoTo
|
|
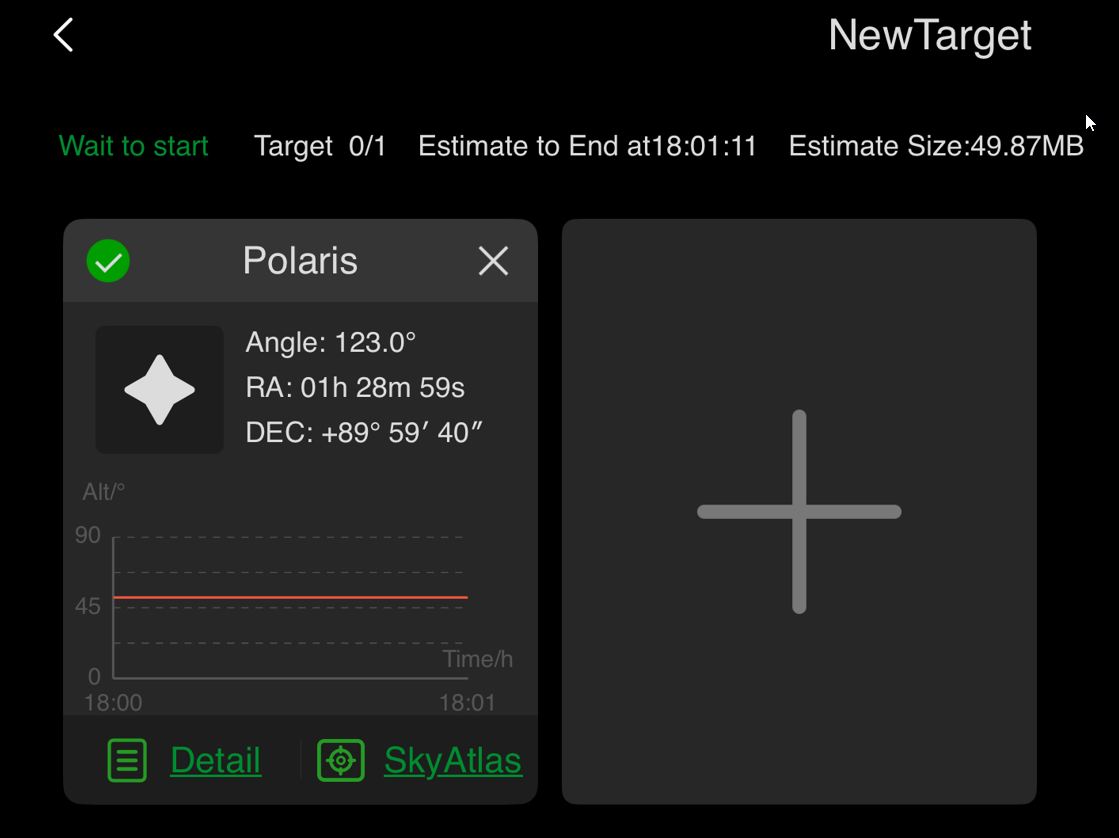
Add the default home position as a first target and let's shoot 1 light frame with 60s exposure.This ensures the success to the plate solve after a GoTo with the correct focus. |
|
Camera Orientation:How you handle the camera orientation depends on whether you have an electronic camera rotator for automatic operation, such as the ZWO CAA, or if you need to rotate the camera manually. Automatic Camera Rotation:The ZWO ASIAIR will automatically rotate your camera as required by the imported mosaic plan. Manual Camera Rotation:The correct camera orientation can be obtained by a simple calculation and depends on the position angle returned by Telescopius,com and the initial camera orientation:
|
|
|
Please refer to the Processing Mosaic Images chapter for the next steps. |
|
|
|
|


Created with the Personal Edition of HelpNDoc: Free iPhone documentation generator