
ASIAIR based workflow |
Target Planning with ASIAIR and SkyAtlas |
updated: 2025-07-15 |
|
Purpose |
Use one of several target planning tools: |
|
|
Previous Step |
||
|
Next Step |
||

See the GoTo function of the Preview mode (available also in the Focus and Video mode)
- Target planning using the SkyAtlas (available since Version 1.9 of the ASIAIR SW).
- Mosaic planning is available since version 2.0 of the ASIAIR SW.
Tap on the  at the bottom left side of the screen to open the SkyAtlas.
|
|
Functions:Blue rectangle: represents the actual Field of View (FoV) of your telescope (where your scope is pointing to) Red rectangle represents the target frame (where could want to point your scope to) Also the relative orientation (camera rotation) is shown.
|
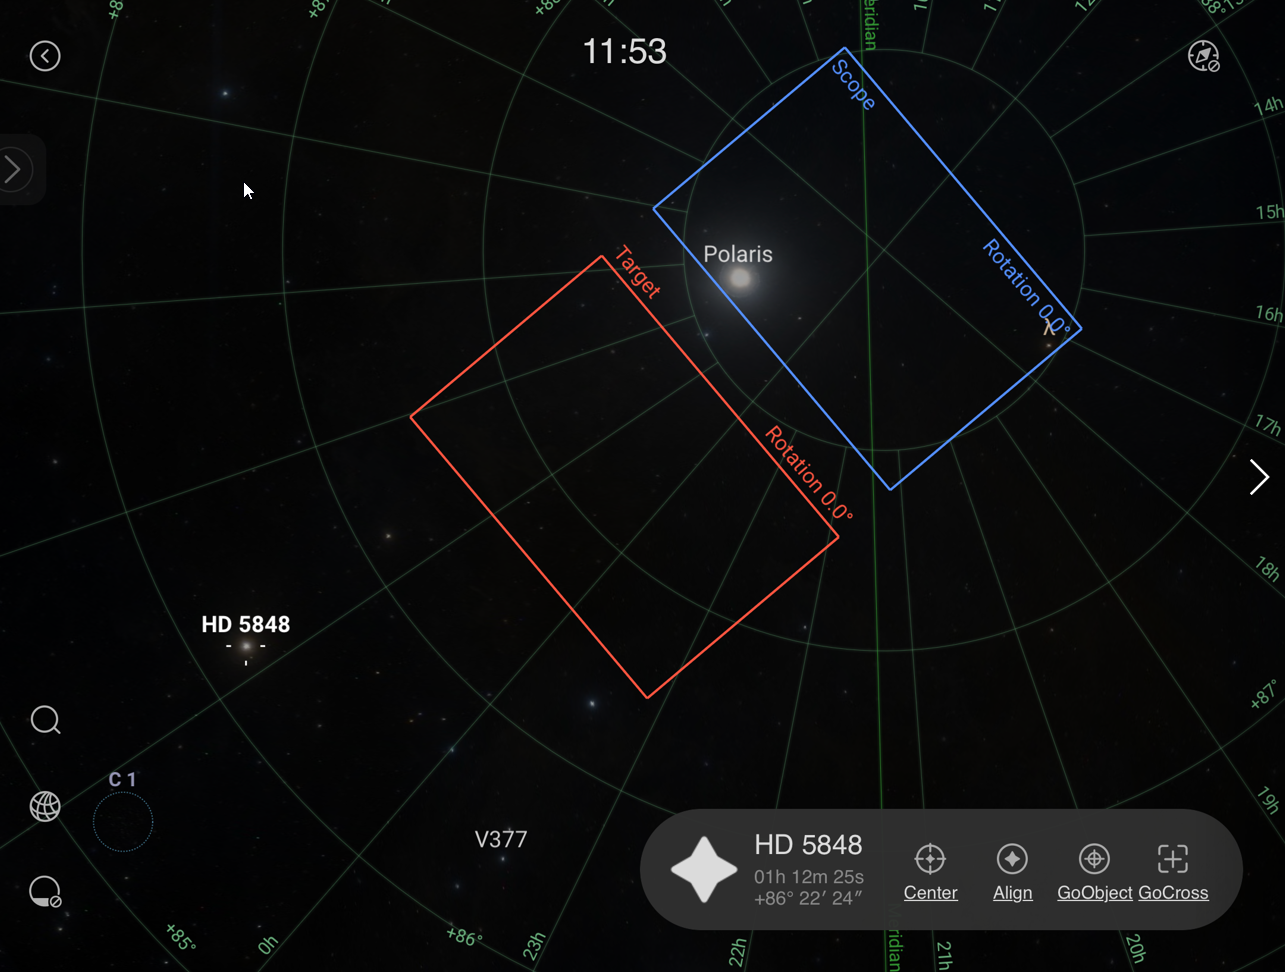


Both actions (GoObject and GoCross) will start a plate solve to verify the exact position of the scope.
Please read these articles in case you are planning a mosaic image consisting of multiple frames covering a larger area than the FoV of your scope.
- Target and Mosaic Planning using ASIAIR SkyAtlas
- Target and Mosaic Planning on Telescopius.com
- Import plan from Telescopius - ZWO User Forum (astronomy-imaging-camera.com)
Created with the Personal Edition of HelpNDoc: Easily create EBooks