
ASIAIR based workflow |
Using ASIAIR Live Stacking Mode |
updated: 2024-08-14 |
Live stacking needs some preparation - in order to work correctly you should first shoot calibration frames like bias, dark and flat frames with the live tracking function. Different from the Autorun and Session Plans, the calibration frames are stacked during the shooting process to so called Master Calibration Frames for later stacking together with the light frames.
WARNING: I encountered the problem of missing astrometric data (OBJCTRA and OBJCTDEC missing) in the light frames since March 2024 when using the live mode of ASIAIR. It's not clear yet if the live mode is the reason for the missing astrometric data.
Procedure |
click on the images to open in higher resolution |
|
ASIAIR Video Main Screen To open the Live Stacking function, select Live on the ASIAIR right side menu on the main screen |
|
|
Capturing Live Frames Set exposures and assign the calibration frames: |
|
|
You can also activate the Autosave function to keep all frames for later computer based integration: Enabling the autosave function leaves all files and the final stacked image in the same folder on the CF card or USB drive: |
|
|
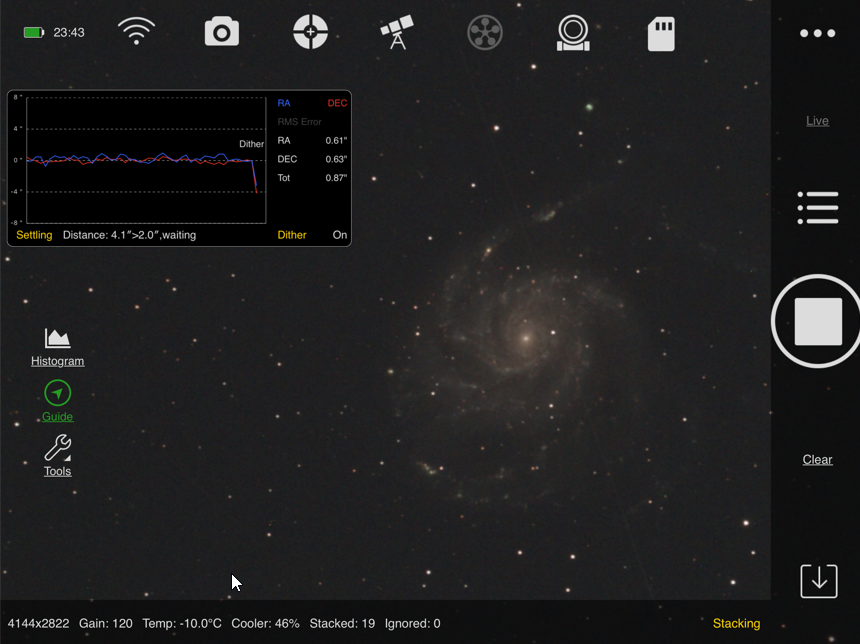
Start Live Stacking Click on the Start button to start capturing the light frames. |
M101 live capturing using a TS-Optics 90/600 OTA (M101 manually magnified) |
|
Stop Live Stacking Important: there is no other way to limit the number of exposures than to manually stop capturing frames. |
|
|
Save the Stacked Image Don't forget to save the stacked image by tapping on the |
|


See article: Review: Live Stacking with the ASIAIR Pro by David Parks | ZWO ASI (astronomy-imaging-camera.com)
This very good article also explains how to:
- focus
- catch dark, bias and flat frames
Created with the Personal Edition of HelpNDoc: What is a Help Authoring tool?