
|
PixInsight - Comet Processing |
Automatic Weighted Batch Pre-processing for Comets |
updated: 2025-10-14 |
Chapter needs to be revised because the AWBPP script is no longer available.
|
Purpose |
This script will add all the light frames, the flats, the darks and the bias frames, register them, stack and debayer |
|
Menu |
Script 🡺 Batch Processing 🡺 WeightedBatchPreprocessing |
|
Input |
Batch of original pre-selected Light frames + master Dark, Flats and Bias frames |
|
Output |
batch of debayered and comet-aligned frames with a *_a_c_d_r.xisf suffix |
|
Previous Step |
|
|
Next Step |
|
|
Tutorial |
Step |
Action |
Description |
1 |
Perform a Automatic Selection using Sub-Frames Selector |
|
2 |
Open the Automatic Weighted Batch Pre-processing (AWBPP) Script(NO LONGER AVAILABLE!) |
|
3 |
Set Global Options
|
|
4 |
Adding Frames (Lights, Bias, Dark etc.)
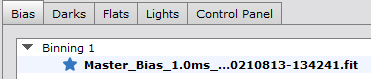
Make sure to check Master frames will be marked with an asterisk, see figure 2.1 on the right For example: if you did a live stacking with ASIAIR Pro you will get filenames like: "Stack20_Bias_1.0ms_Bin1_gain120_20210813-134241.fit". Just rename them to e.g. "Master_Flat20_Config04_40.0ms_Bin1_gain120_20210813-144229.fit" and the automatic batch process will be able to treat them as master files. Otherwise the calibration frames will be ignored during the light frame calibration part of the process with an error message like: !!! Error: Master Flat file was not be generated. When adding light you may also consider adding the manually approved light frames from 1.1 Blink or 1.2 Automatic Selection using Subframe Selector in order to avoid integrating frames with satellite streaks or other artifacts. |
|
5 |
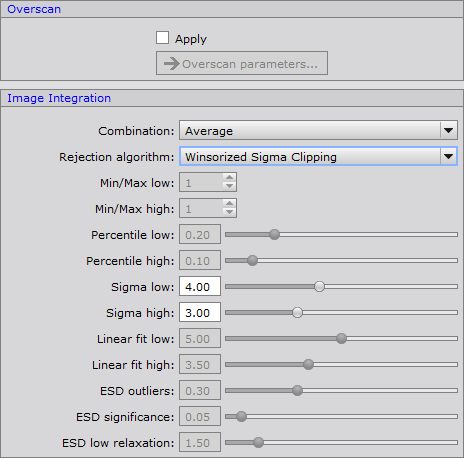
Bias Frames Integration SettingsCombination: Average Rejection Algorithm:
If you are using Master Bias Frame, the above settings do not apply. In this case use "No Rejection" as rejection algorithm. |
|
6 |
Dark Frames Integration Settingssame settings apply as for Bias Frames |
|
7 |
Flat Integration Settingssame settings apply as for Bias Frames |
|
8 |
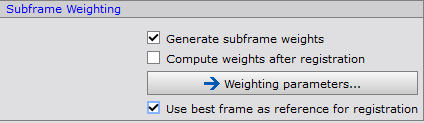
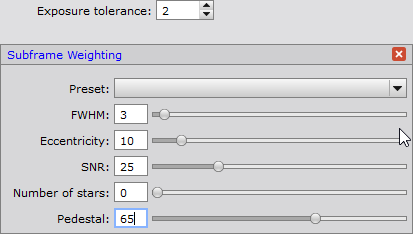
Light Frame Handling Subframe Weighting for CometsImportant: please uncheck the Image Integration step for comets, as the alignment will be done with a different tool: the Comet Alignment Tool (see next step) |
|
9a |
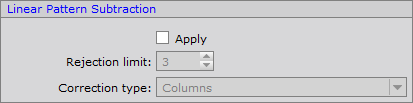
Linear Pattern Subtraction |
|
9b |
Cosmetic Correction |
|
9c |
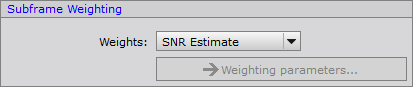
Subframe Weighting SNR: If this option is checked light frames will be analyzed and weighted accordingly to the relative weights assigned to FWHM, eccentricity and SNR. Weights are saved into the image as WBPPWGHT header key which will be used during the ImageIntegration process. |
|
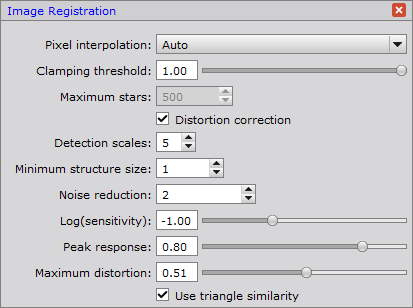
9d |
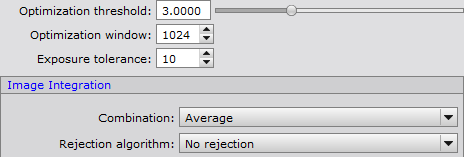
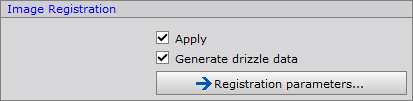
Image Registration try the settings on the right. Set Pixel Interpolation to Auto or try Lanczos-3, which seems to be a good interpolation algorithm. |
|
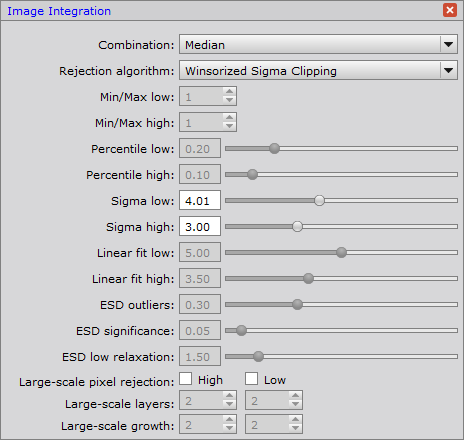
9e |
Image Integration (Stacking)Rejection Algorithm:
|
|
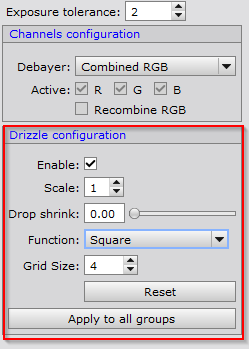
10 |
On the Post-Calibration tabenable Drizzle configuration (always for OSC cameras!) |
|
11 |
Set the output folderUse subfolder "...\_Astro\Observations\2023\20230208-193349_C-2022 E3_GÖ-MBR\Work" as output directory. |
|
12 |
Start the batch processby first running a diagnostic check and then the click on Run if the diagnostic didn't return any problems. |
|
13 |
Check and save the log file for documentatione.g. into a subfolder "logs" and name it according to major process settings, e.g. "AWBP_Lanczos-3_ ProcessLogger.txt" or similar. |
|
14 |
Next Step: |
|


Created with the Personal Edition of HelpNDoc: Free iPhone documentation generator