
|
PixInsight - Alignment and Integration |
Image Integration for Stars and Deep Space Objects
|
updated: 2024-12-12 |

|
Purpose |
Image Integration for Stars and Deep Space Objectscombines all subs from the same area (or frames or pictures) to one single picture and is intended for stars and deep space objects (DSOs). Repeating measurements is a fundamental technique to analyze and reduce uncertainties in observations. By combining several measurements of the same quantity, random errors tend to cancel out and the observed value can thus be determined with less uncertainty. The image integration task does basically the same thing: combine a set of images of the same subject to improve the signal-to-noise ratio in the resulting image. The ImageIntegration tool allows you to perform this task with a large number of features and resources designed to help you get the best possible result out of your data. |
|
Activation |
Process 🡺 All Processes 🡺 Image Integration |
|
Input |
Star aligned images with a “*_c_d_r” postfix from sub folder "4_Registered" |
|
Output |
integrated picture, file name like “20210815_M101_ZWOASI294_nnnn.xisf” into sub folder "5_Integration" where nnnn = observation ID |
|
Previous Step |
|
|
Next Step |
|
|
Resource(s) |
https://www.youtube.com/watch?v=UUx-OM3TWs0 (Part 4 - beginning in the middle at minute 14) |
Step |
Description |
Action |
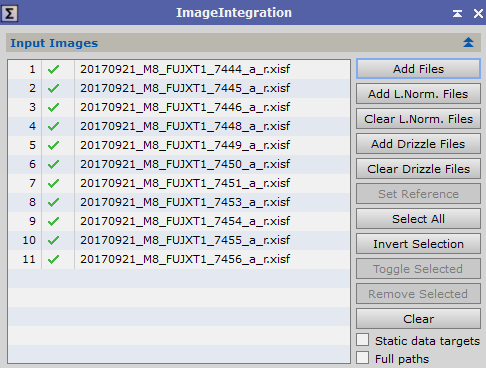
1 |
Selecting the image input
|
|
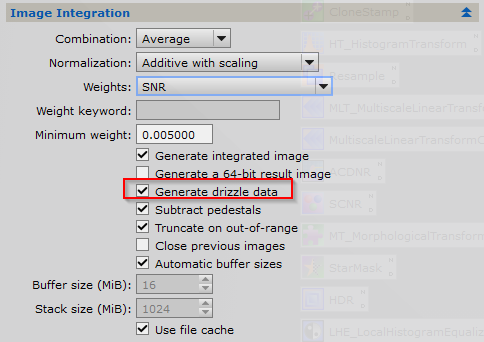
2 |
Set integration parameters
|
|
3 |
Select Pixel Rejection Algorithm (1)
|
|
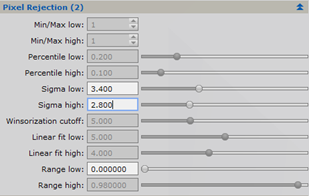
4 |
Pixel Rejection Algorithm (2)
|
|
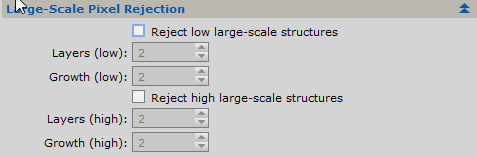
5 |
Large Scale Pixel Rejection
|
|
6 |
Start the Image Integration |
|
7 |
Save all final imagesImportant: At the end of the process you will get 3 files:
All files must be saved individually for further usage as *.xisf files into the folder "4_Integration" |
Save the final frames to subfolder "4_Integration" using the naming convention e.g.: “20210815_M101_ZWOASI294_0000.xisf” |
8 |
Next Step: Drizzle Integration or Image Quality Enhancements |
|


Created with the Personal Edition of HelpNDoc: How to Protect Your PDFs with Encryption and Passwords