
|
PixInsight - Image Post Processing |
WBPP - Weighted Batch Preprocessing |
updated: 2026-01-21 |
|
Purpose |
This script will add all the light frames, the flats, the darks and the bias frames, register them, stack them, debayer them and return a single stacked image |
|
Menu |
Script 🡺 Batch Processing 🡺 WeightedBatchPreprocessing |
|
Input |
Batch of original pre-selected Light frames + master Dark, Flats and Bias frames |
|
Output |
integrated picture, file name “*_i.xisf” into sub folder "\_Astro\2021 Astro\20210814 M101\AutoCal\master" |
|
Previous Step |
|
|
Next Step |
|
|
Tutorial |
Notice: WBPP does not (yet) provide an integrated image solving step (Astrometry). Typical, after running the WBPP, the first thing to do is take the fresh Master Light image, the crop it (this removes any existing astrometry data) and run the run the Image Solver script (Script > Image Analysis > Image Solver) on the final master light image to update the master file with astrometric data. Astrometric data is required for e.g. SPCC Spectrophotometric Color Calibration or PCC - Photometric Color Calibration.
Step |
Action |
Description |
1 |
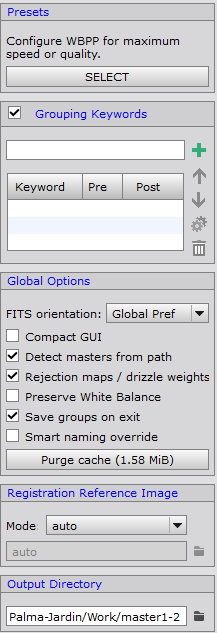
Set Global Options
|
|
2 |
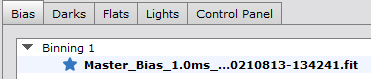
Adding Frames (Lights, Bias, Dark etc.)
Make sure to check Master frames will be marked with an asterisk, see figure 2.1 on the right To ensure that the master files generated by ASIAIR are recognized as Master Calibration Files by PixInsight and thus supplied with the correct parameters by Weighted Batch Pre-Processor (WPP), the file names for Master Calibration Files are subject to special naming conventions. A correct file name could therefore be : MasterFlat_Stack20_50.0ms_Bin1_2600MC_filter-NoFilter_gain100_20250221_1.6C.xisf and the automatic batch process will be able to treat them as master files. Otherwise, the calibration frames will be ignored during the light frame calibration part of the process with an error message such !!! Error: Master Flat file was not be generated. When adding light you may also consider adding the manually approved light frames from Blink or Automatic Selection using Subframe Selector in order to avoid integrating frames with satellite streaks or other artifacts. Note: After loading all light, bias, dark and flat frames once, click Flat Frame Filter Problem: If you see a message like this Note: No Master Flat will be used to calibrate the frames. then PixInsight was probably unable to correctly interpret the contents of the calibration frame. although binning, filter, exposure are recognized correctly. Workaround: Flat Frames should also contain the correct filter name in the in the filename. Because color light frames from an ASIAIR OSC camera never contain any filter information, even if a filter has been used. The Master Flat Frames must therefore be renamed and the string _filter-NoFilter must be added somewhere in the filename. They also need to be converted from a .fit to a .xisf file in order to be accepted by the WBPP or FBPP batch pre-processing scripts in PixInsight. |
|
3 |
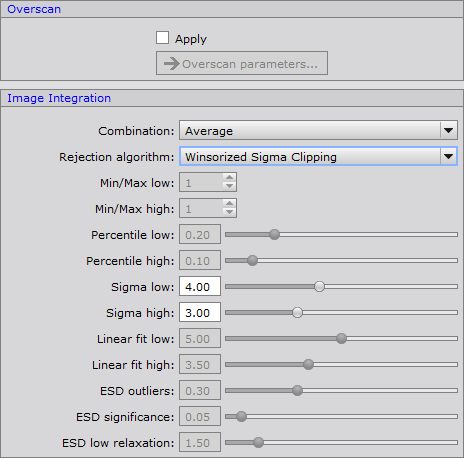
Bias Frames Integration SettingsCombination: Average Rejection Algorithm:
If you are using Master Bias Frame, the above settings do not apply. In this case use "No Rejection" as rejection algorithm. |
|
4 |
Dark Frames Integration Settingssame settings apply as for Bias Frames |
|
5 |
Flat Integration Settingssame settings apply as for Bias Frames IMPORTANT: Flat Frames should also include the correct filter name in the FITS header. As color light frames from an ASIAIR OSC camera never contain any filter information, they will be treated as NoFilter files and therefore the Flat Frames must have the FITS entry FILTER = NoFilter as well in order to be accepted by the WBPP or FBPP batch pre-processing scripts (see chapter Calibration Frames for more details) |
|
6 |
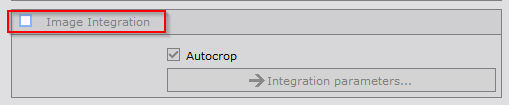
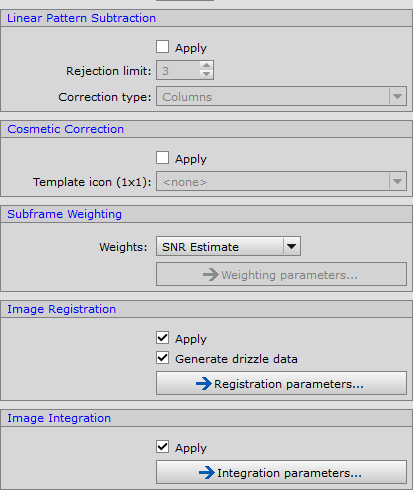
Light Frame Handling Subframe Weightingtry the settings on the right Comet processing:WARNING: if you are processing frames of a comet then please make sure not to use the integrated Image Integration. Uncheck the the Image Integration step in case of comet pictures (see top right screenshot). Image integration will be done using the Comet Alignment tool. |
|
6a |
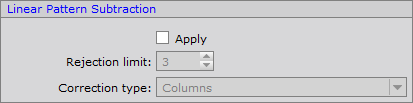
Linear Pattern Subtraction |
|
6b |
Cosmetic Correction |
|
6c |
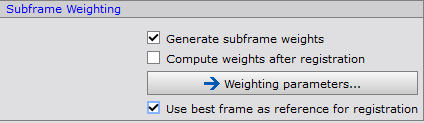
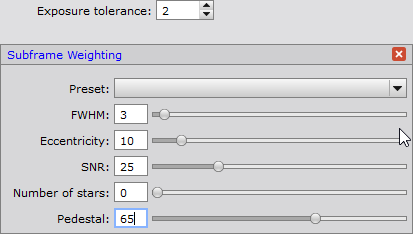
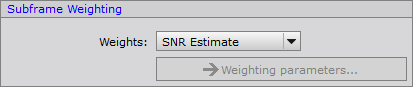
Subframe WeightingSNR: If this option is checked light frames will be analyzed and weighted accordingly to the relative weights assigned to FWHM, eccentricity and SNR. Weights are saved into the image as WBPPWGHT header key which will be used during the ImageIntegration process. |
|
6d |
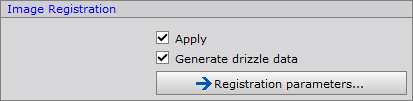
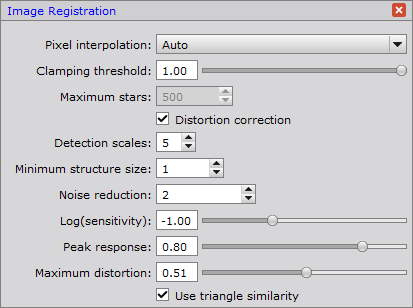
Image Registrationtry the settings on the right. Set Pixel Interpolation to Auto or try Lanczos-3, which seems to be a good interpolation algorithm. |
|
6e |
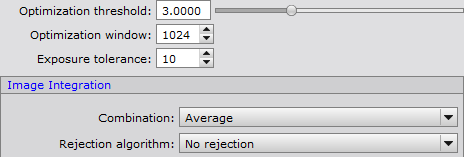
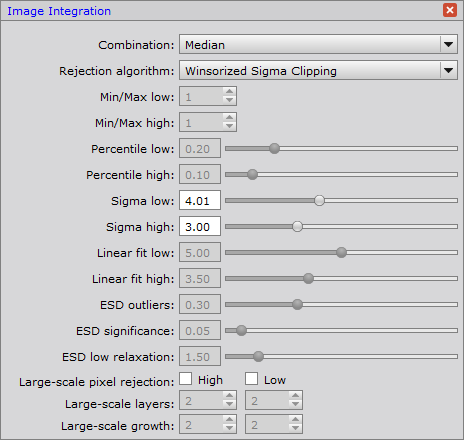
Image Integration (Stacking)Rejection Algorithm:
|
|
7 |
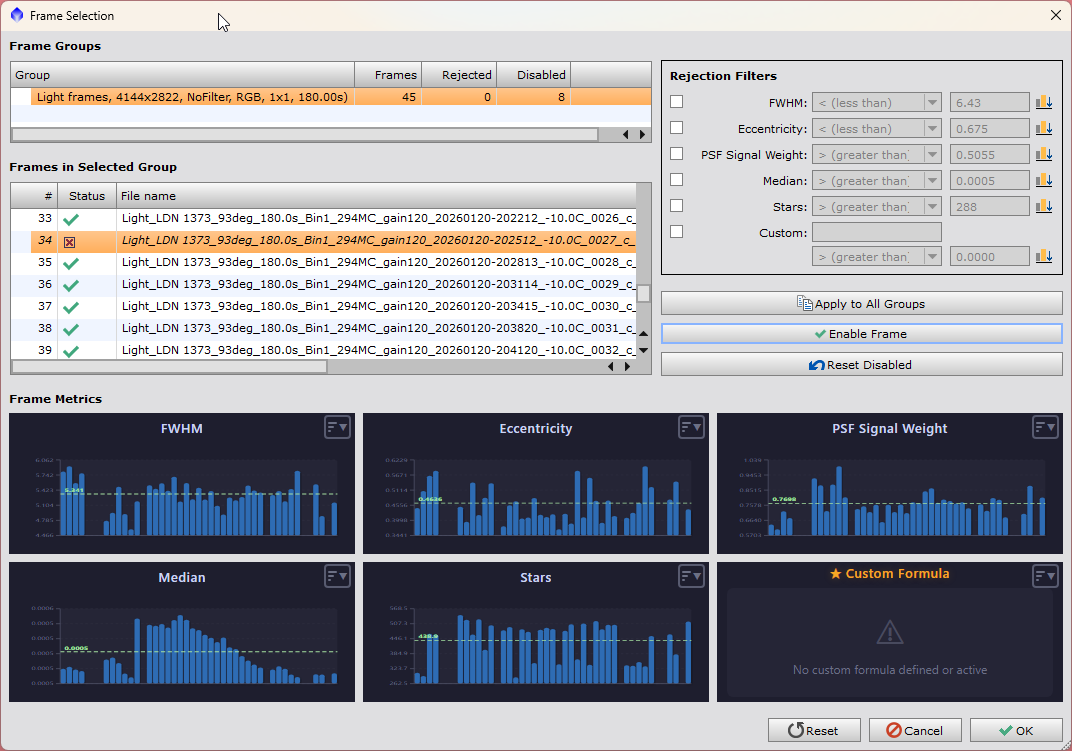
Frame Selection (new since v2.9.0)
Two Operating ModesInteractive Mode When Interactive mode is enabled:
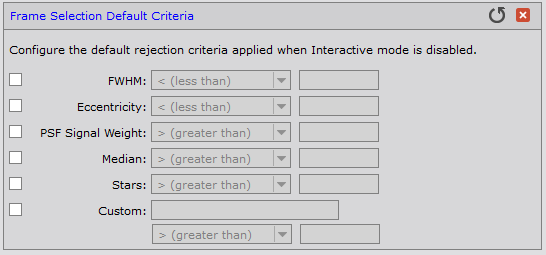
Automatic Mode When Interactive mode is disabled:
read more: New WBPP 2.9.0 Release | PixInsight Forum |
|
8 |
On the Post-Calibration tabenable Drizzle configuration (always for OSC cameras!)
|
|
9 |
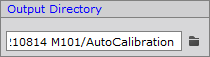
Set the output folderUse subfolder "AutoCal\master" as output directory. |
|
10 |
Start the batch processby first running a diagnostic check and then the click on Run if the diagnostic didn't return any problems. |
|
11 |
Check and save the log file for documentatione.g. into a subfolder "logs" and name it according to major process settings, e.g. "AWBP_Lanczos-3_ ProcessLogger.txt" |
|
12 |
Rename the resulting master light image fileTypically, PixIsight will use the original filename and put a "master" in front of the name, like:
|
Consider renaming the file to your own file name convention in the master subfolder using the naming convention, e.g.:
e.g.: “20210815_M101_ZWOASI294_0000.xisf” |


Created with the Personal Edition of HelpNDoc: Achieve Professional Documentation Results with a Help Authoring Tool